Overview
Sentec EMS provides a Bulletin feature to help company manage and share company-wide information more efficiently. Whether you need to announce important updates, publish internal news, or inform employees about upcoming events or activities, you can now easily create, organize, and manage them through the Bulletin menu
Bulletin Management
The Bulletin feature allows you to create and manage various types of information such as announcements, news, or activity updates to share directly with employees through the system. Bulletins can also be configured to appear as pop-up notifications or displayed on the employee calendar for better visibility and engagement.
In this menu, you can:
- View the complete list of created bulletins.
- Filter bulletins by specific criteria such as Name, Category, Status, Scheduled Date, and Expired Date to easily find relevant items.
- Switch between Card View and Table View to choose your preferred display format.
- Use the Download button to export bulletin data directly for reporting or documentation purposes.
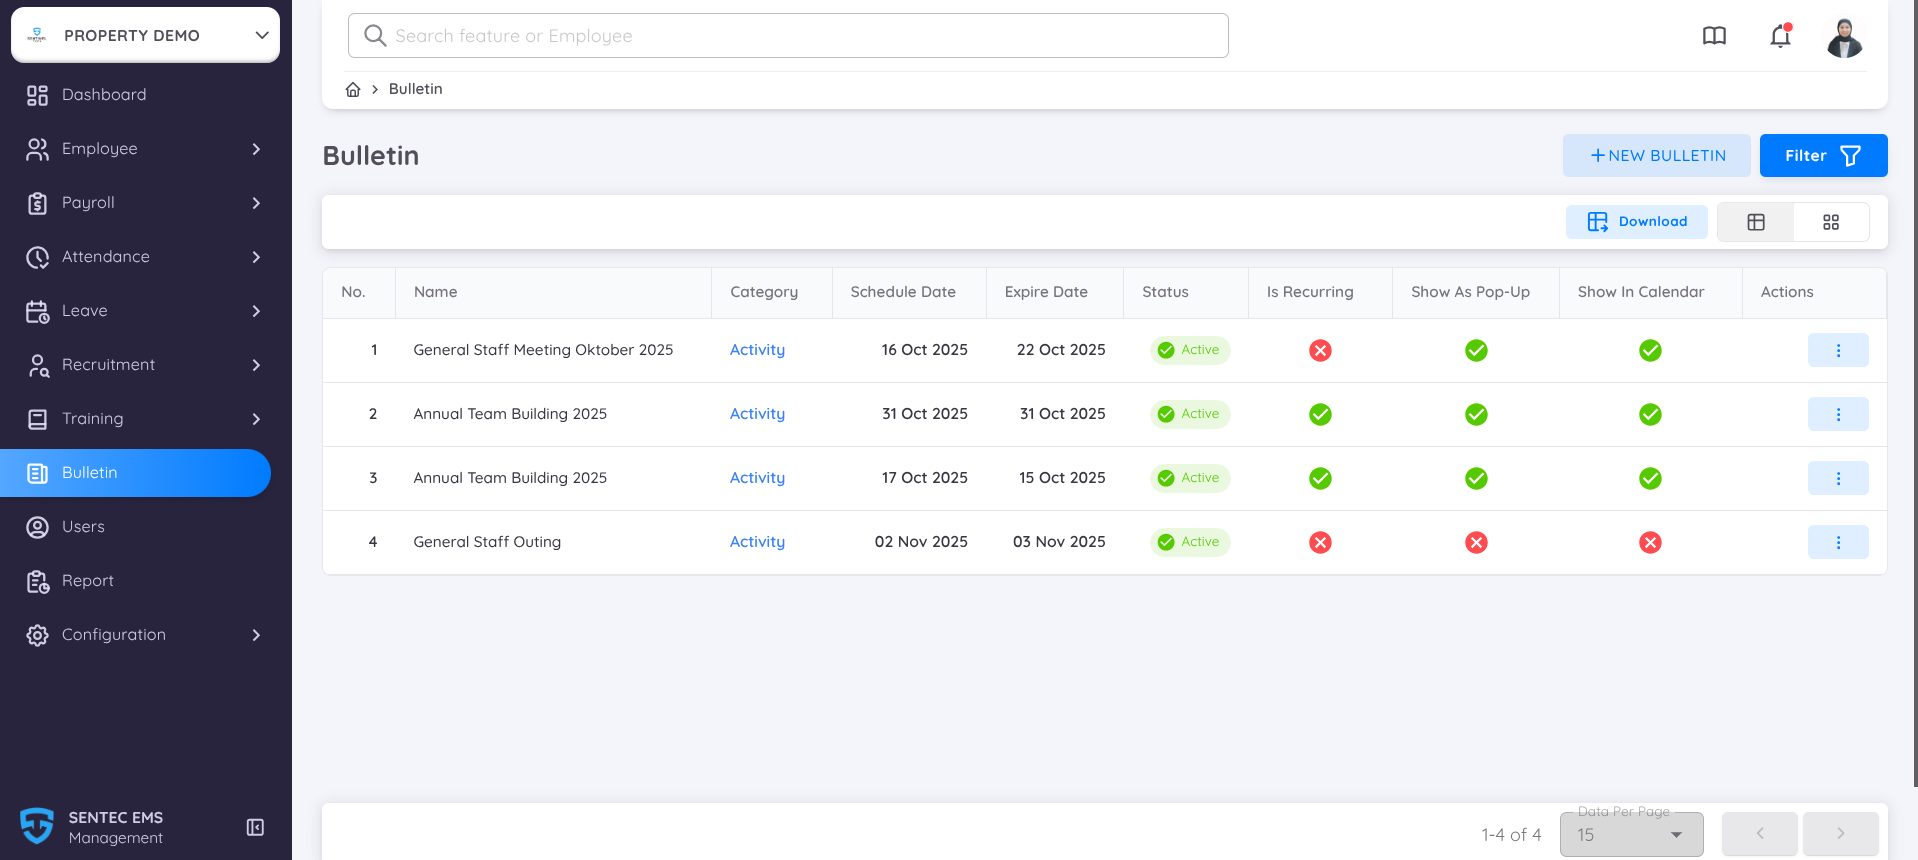
In the table view includes the following information:
- No. – Displays the sequential number of the bulletin in the list.
- Name – The title or name of the bulletin, representing the main subject or announcement.
- Category – The classification of the bulletin, such as Announcement, News, or Activity.
- Schedule Date – The date when the bulletin is scheduled or becomes relevant (e.g., event or update date).
- Expire Date – The date when the bulletin will no longer be visible to employees.
- Status – Indicates whether the bulletin is currently active or inactive.
- 🟢 Green represents Active.
- 🔴 Red represents Inactive.
- Is Recurring – Shows whether the bulletin is set to repeat (for pop-up bulletins that appear regularly).
- 🟢 Green = Activated (Repeating)
- 🔴 Red = Not Activated (One-time only)
- Show As Pop-Up – Indicates whether the bulletin is displayed as an on-screen pop-up notification.
- 🟢 Green = Activated (Shown as Pop-Up)
- 🔴 Red = Not Activated (No Pop-Up)
- Show In Calendar – Indicates whether the bulletin appears on the employee calendar view.
- 🟢 Green = Activated (Shown in Calendar)
- 🔴 Red = Not Activated (Hidden from Calendar)
- Actions – Contains the action menu (⋮) that allows you to view, edit, or delete the selected bulletin.
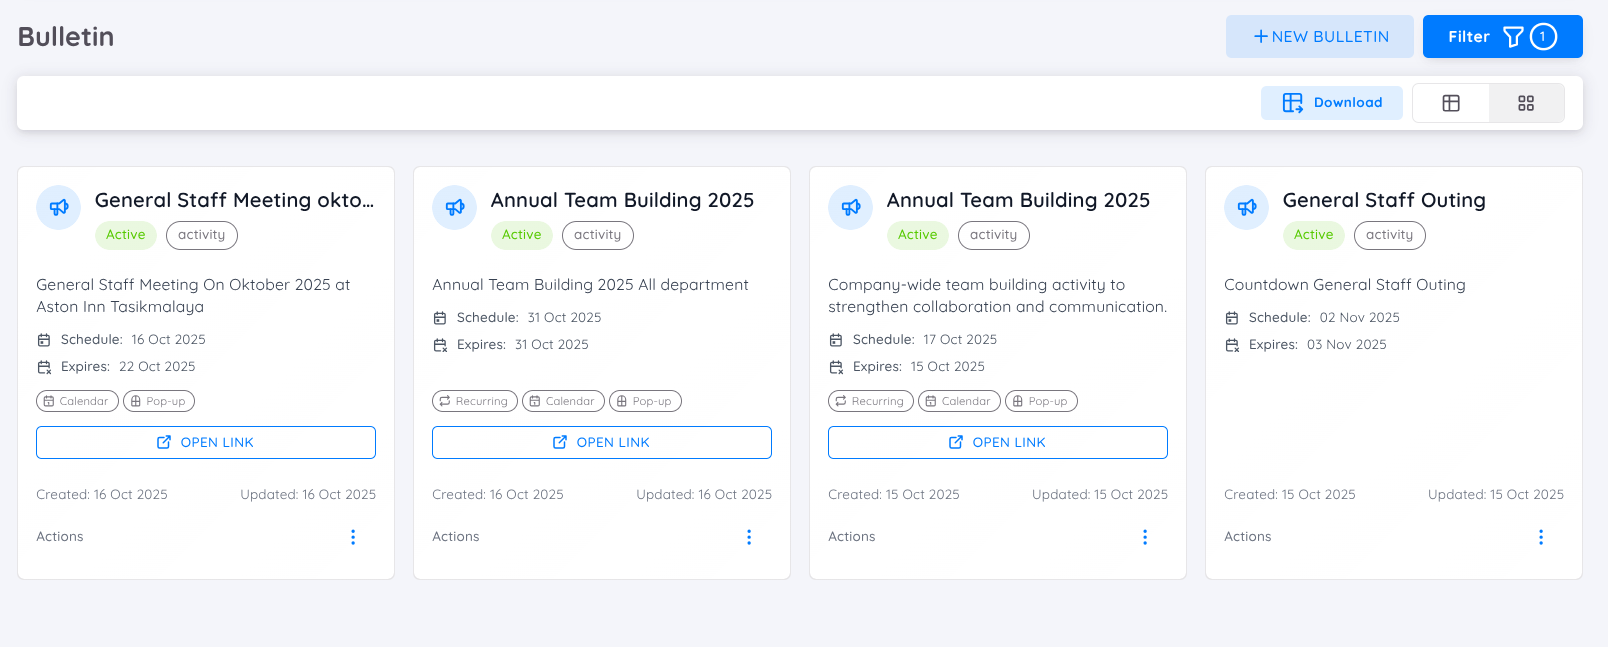
However In Card View, you can click on any bulletin card to open a detailed pop-up view containing the full information of the selected bulletin.
The Bulletin Detail Pop-Up displays:
- Bulletin Name, Category, Status, and Link (if available).
- Schedule Date and Expire Date.
- Is Recurring, Show In Calendar, and Show As Pop-Up indicators:
- 🟢 Green = Activated
- 🔴 Red = Not Activated
- Bulletin Overview – A summary or short description of the bulletin.
- Description – The detailed content or message of the bulletin.
- Property – The property or business unit associated with the bulletin.
- This pop-up provides a clear and complete overview without needing to navigate away from the main bulletin page.
Creating a New Bulletin
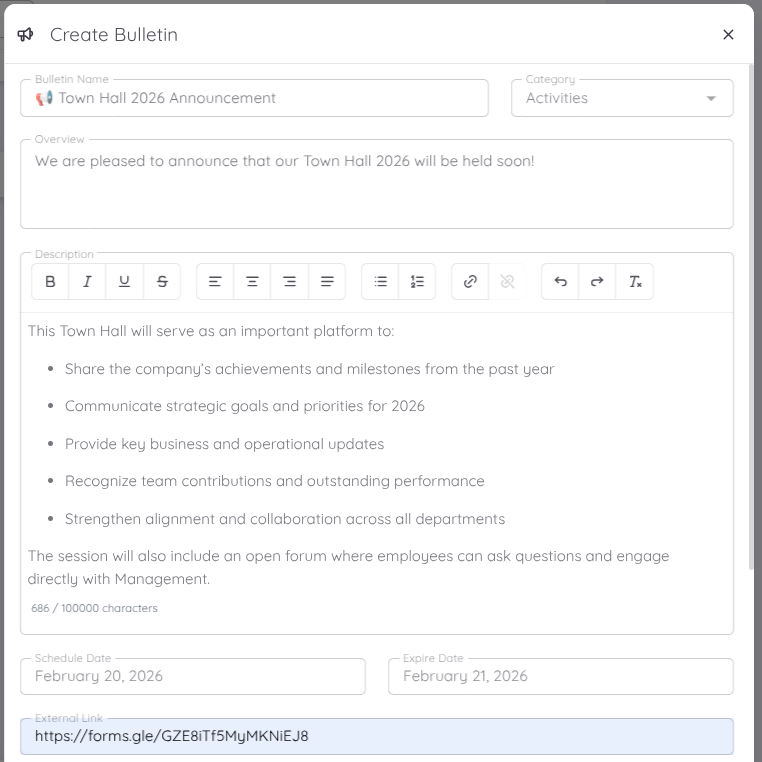
When creating a bulletin, you will need to fill in several required and optional fields to define how your bulletin appears and behaves in the system.
| Field | Description |
|---|---|
| Bulletin Name | Enter the title or headline of your bulletin. This will be displayed as the main title visible to employees. |
| Category | Select the appropriate category for your bulletin, such as Announcement, News, or Activities. Categories help organize and filter bulletins. |
| Overview | Provide a brief summary or highlight of the bulletin’s content. This will appear as a short description before employees view the full details. |
| Description | Write the complete details or main message of your bulletin. You may include event information, updates, or instructions. Rich text formatting may be supported depending on the system configuration. |
| Schedule Date | Set the relevant date for the bulletin — for example, the event date, announcement date, or update date. This date helps employees identify when the bulletin applies. |
| Expire Date | Define when the bulletin will automatically stop being visible. Once expired, it will no longer appear on the employee dashboard or calendar. |
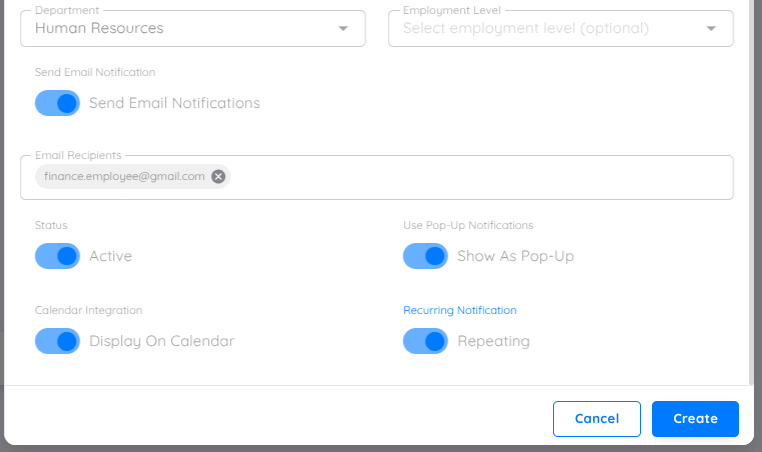
You can also add several optional settings to enhance how your bulletin is displayed and shared with employees:
- External Link : Insert a URL to external resources such as a registration form, company website, or reference material. This helps employees access related information easily.
- Department & Employee Level : Select specific departments and/or employee levels if you want to restrict the bulletin visibility to a targeted audience.
- Send Email Notifications : Activate the toggle to distribute the bulletin via email.Once activated, you can enter the recipient email addresses. Multiple email addresses can be added by typing the email and pressing Enter.
- Active : Toggle this option on to publish the bulletin. When disabled, the bulletin will remain in draft mode until activated.
- Show as Pop-Up : Enable this option to make the bulletin appear as an on-screen pop-up notification on the employee dashboard. Useful for urgent announcements or reminders.
- Display on Calendar : Activate this to show the bulletin as an event on the employee calendar, especially for bulletins related to scheduled activities, meetings, or events.
- Repeating : Use this feature if you want the Pop-Up bulletin to appear regularly every time users access the dashboard page. This setting is ideal for recurring reminders, ongoing announcements, or events that require continuous visibility.
After filling in all the required and optional fields, the next step is to publish your bulletin by clicking save. Before doing so, make sure that all information entered is complete and accurate to ensure the bulletin is displayed correctly to employees.
Editing a Bulletin
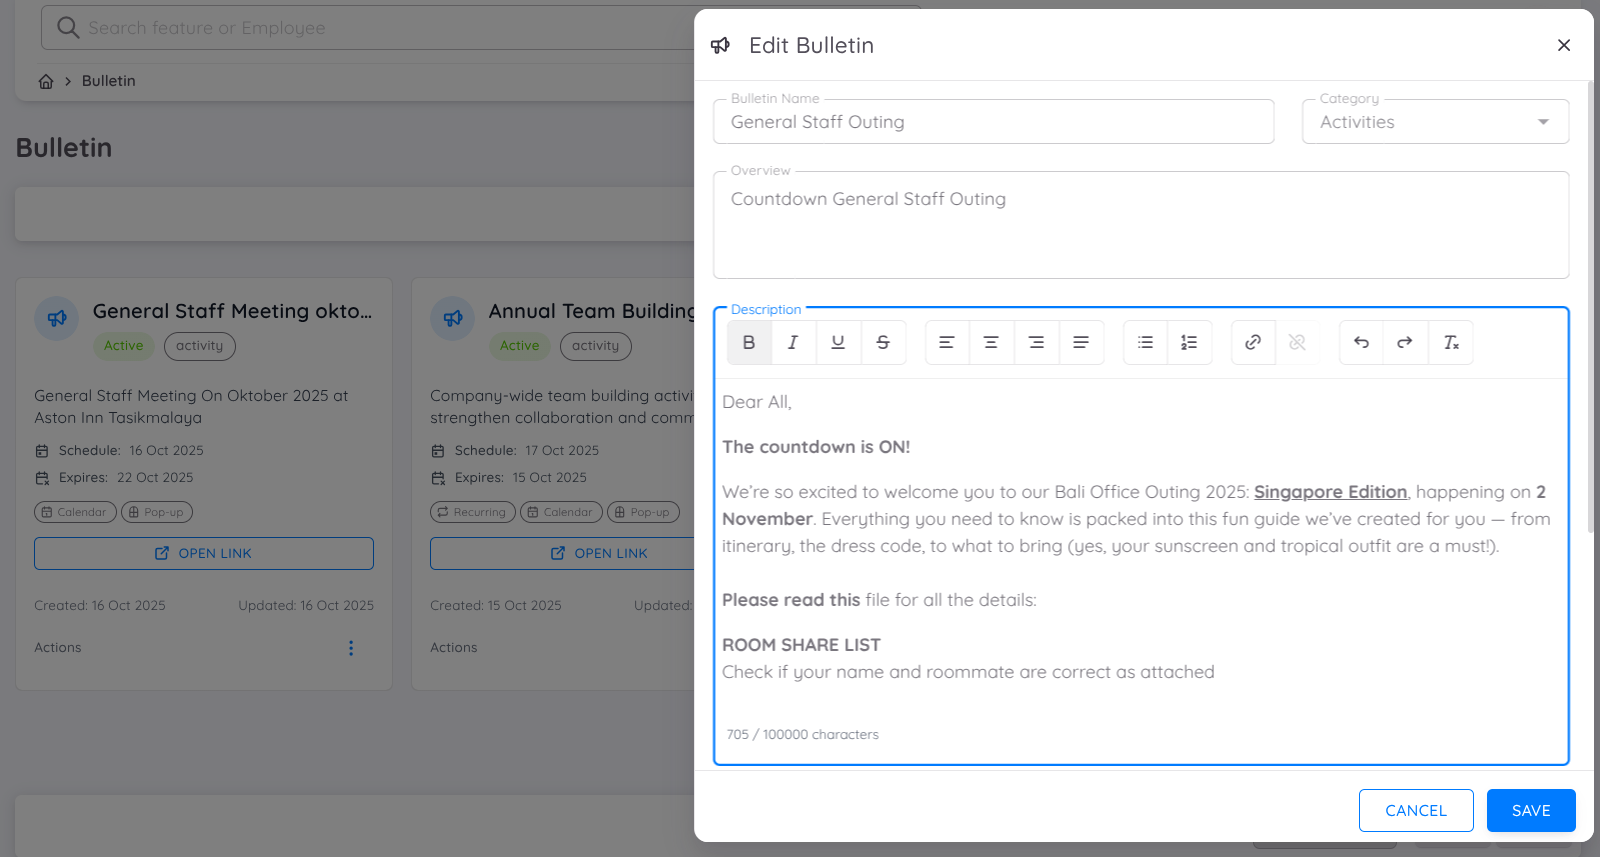
The Edit Bulletin feature allows you to update an existing bulletin at any time. You can access it by selecting the Edit option from the action menu (⋮) in the bulletin list or card view.
In the edit page, you can modify the bulletin’s details such as Name, Category, Overview, Description, Schedule Date, and Expire Date. The rich-text editor provides formatting options that help you emphasize key points, insert links, and structure your content clearly.
You can also adjust the Optional Settings as needed.
Once updates are saved, the system will automatically apply the latest configuration. Any changes made to an Active bulletin will be reflected immediately, while those in Draft status will remain hidden until activated.