Add New Employee
To add a new employee, click the "Add Employee" button on the employee list page.
First Tab (Employee)
In the first tab, users will be prompted to enter and verify their email address, this mail will later be used to log in to the Sentec EMS application.
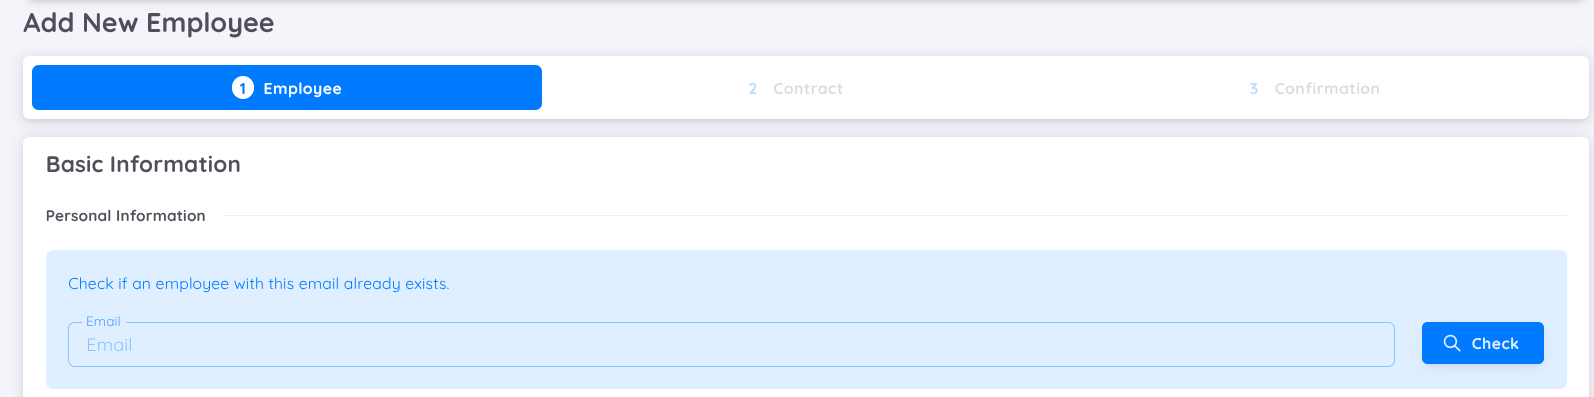
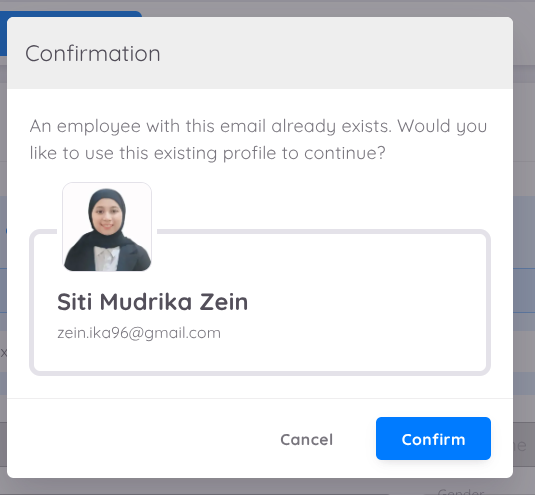
If the email has already been registered, a pop-up confirmation will appear, asking whether to use the existing data.
If no data is available, users will be directed to fill in the required information.
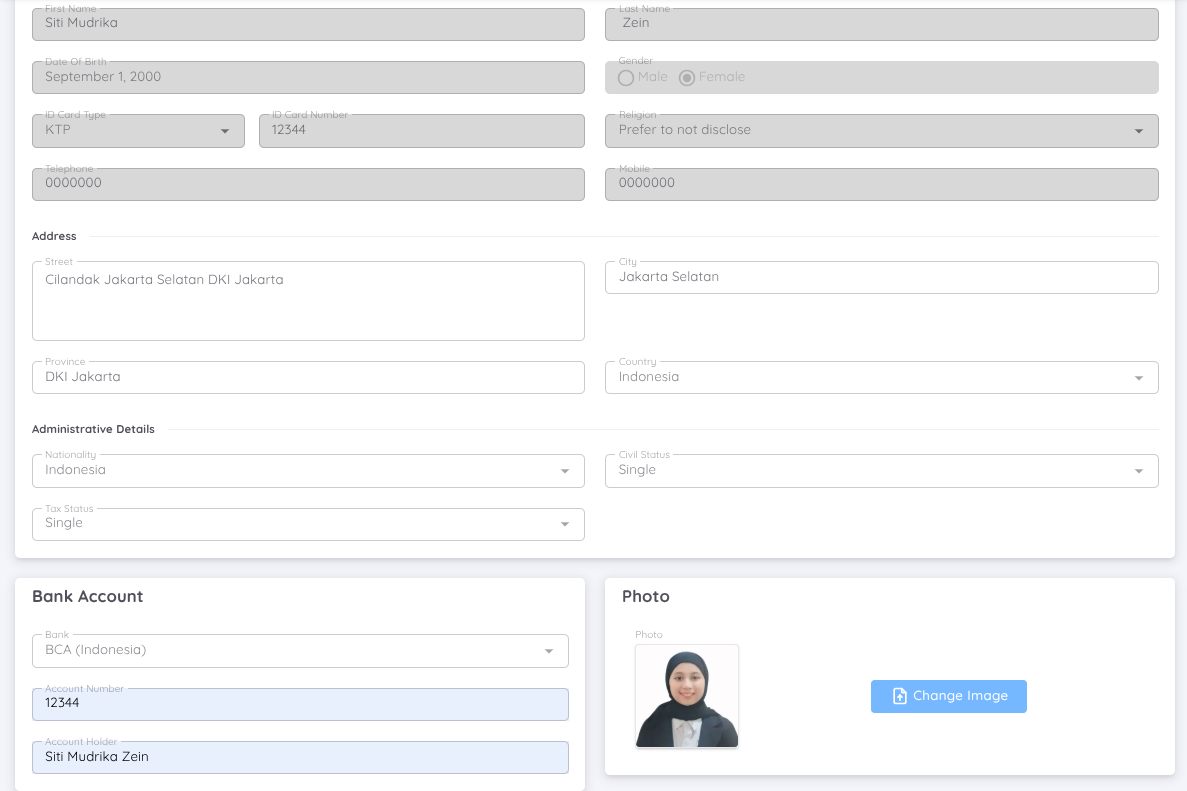
All information in the basic information and bank data sections must be filled out according to the employee's information.
- Email: The personal email address used by the employee to log in to the employee page. Now, user can log in using a magic link, which supports email addresses other than those from Google.
- Civil Status: The employee's marital status.
- Tax Status: The status used by the employee for tax reporting purposes.
- Photo (optional): Photos can be added in two ways, either through the Employee app or Sentec EMS Management.
NOTE
Civil status and tax status can differ. For example, a female employee may have a marital status of married with two children (civil status), but her tax status may be set as single.
Second Tab (Contract)
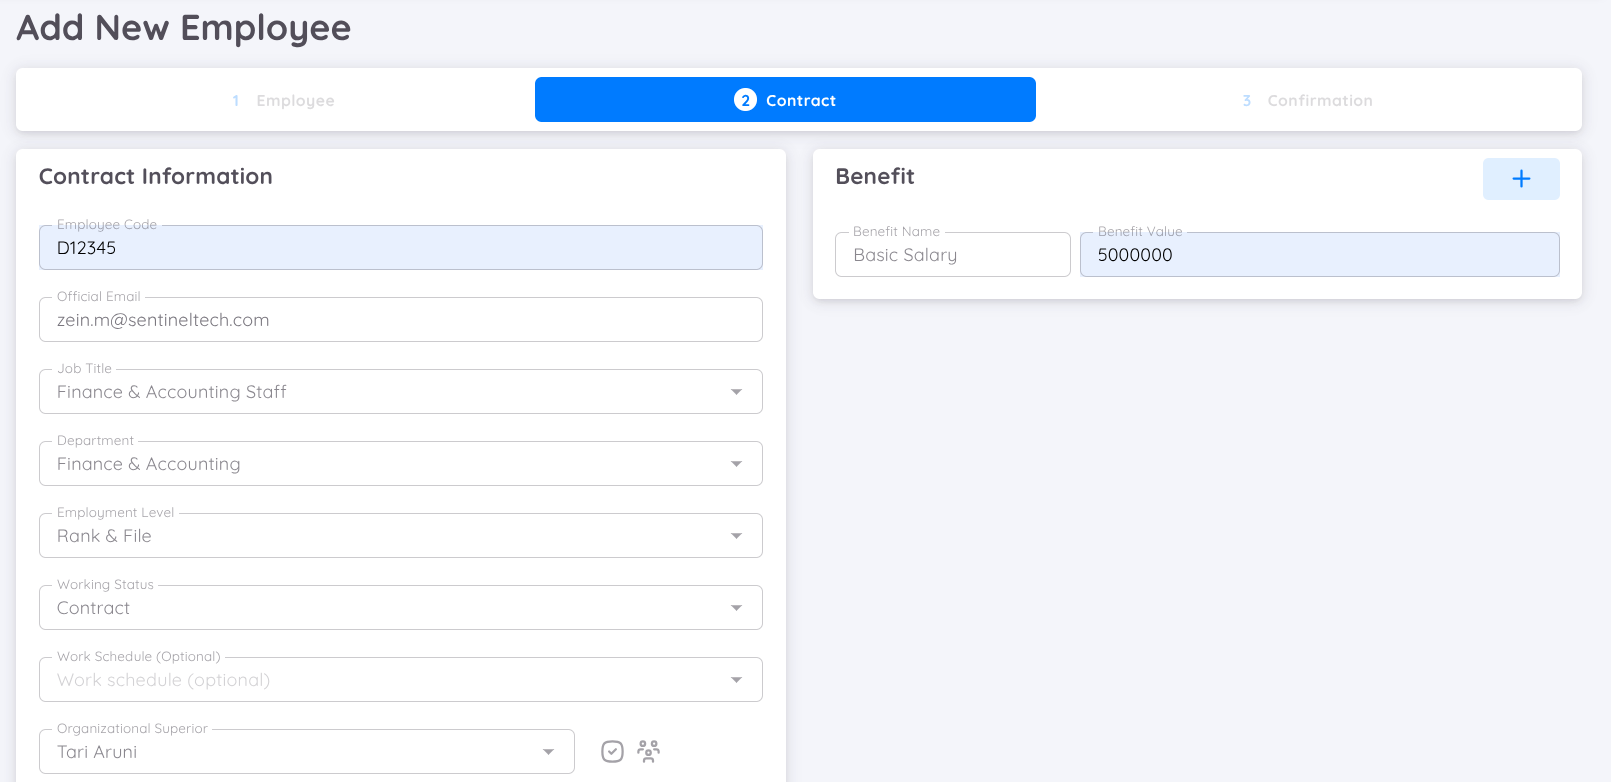
After filling in the employee's information, the next step is to create a contract. Some contract-related information includes:
- Employee Code: The employee's code (can be filled in with a code from the unit), The employee code must be unique.
- Official Email: The company's official email address (if not available, a personal email can be used).
- Work Schedule: Should only be filled in if the regular employee has a different work schedule from other regular employees (or non-default).
NOTE
You can create a new work schedule for specific regular employees from the setup page.
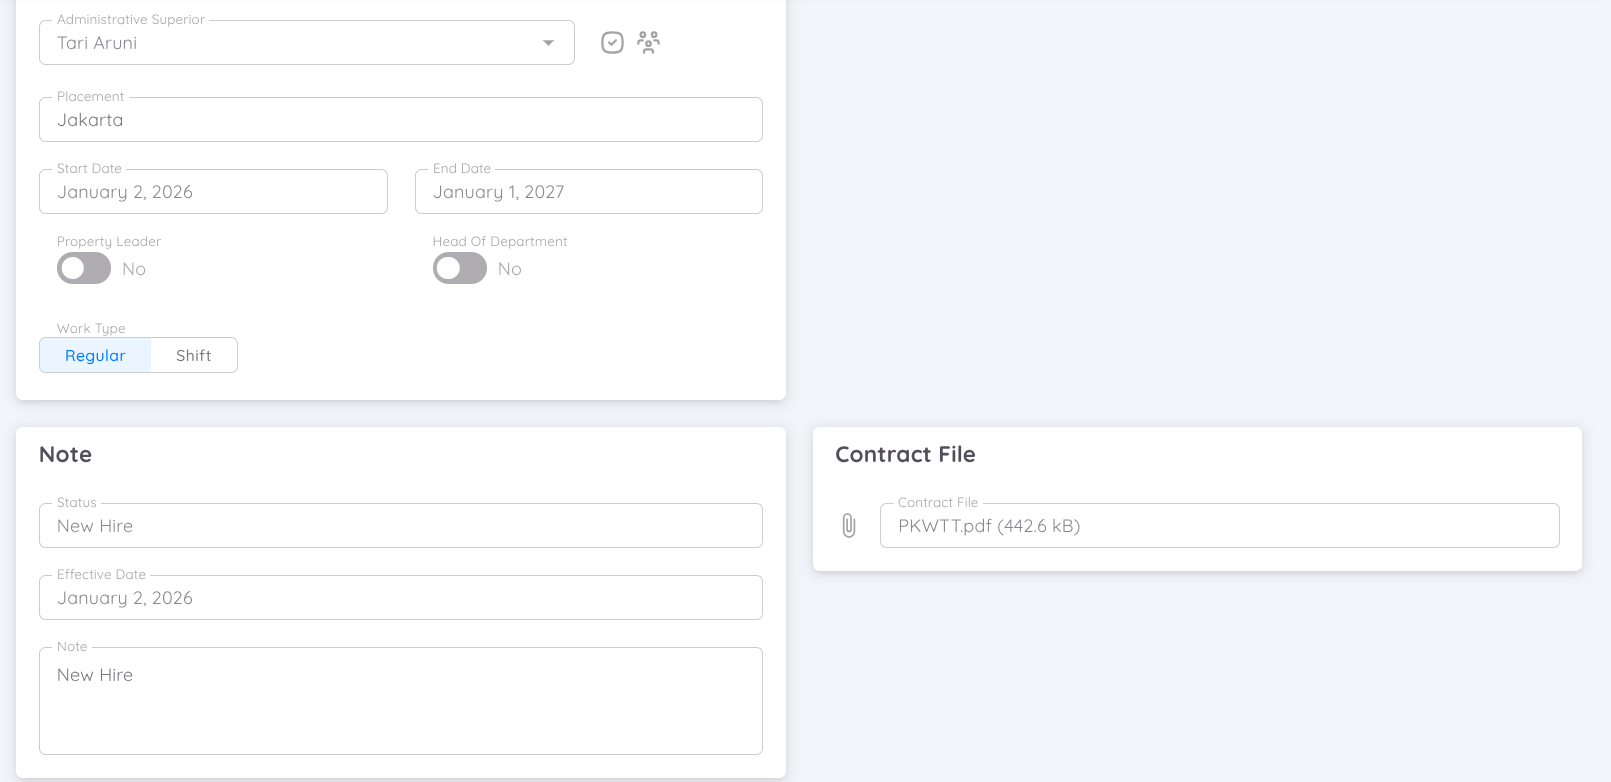
- Organization Superior: The employee's direct superior in the organizational structure.
- Administrative Superior: The employee's superior for administrative matters such as leave requests.
NOTE
A superior can come from a different company but still be within the same organization.
- Head of Department: Determines if the employee is the head of their department.
- Property Leader: Determines if the employee is the property leader.
- Work Type: Determines if the employee works on a shift or regular basis.
- Placement: Filled with employee's office placement
- Benefit: A list of benefits (Basic Salary or FPSC) available to the employee.
NOTE
Basic salary must be filled in as it will be used in the payroll report generation process. FPSC (Fixed Pay Salary Component) must also be selected and filled in if the payroll profile uses FPSC. Make sure to fill in basic salary and FPSC with numbers (if none, fill in 0), while other benefits can be filled in with numbers or text.
The benefit that can be added to the contract is for fixed benefits
- Effective Date (Note): Determines the start date of the contract.
- Upload Contract: Upload the contract document in PDF format (optional).
Third Tab (Confirmation)
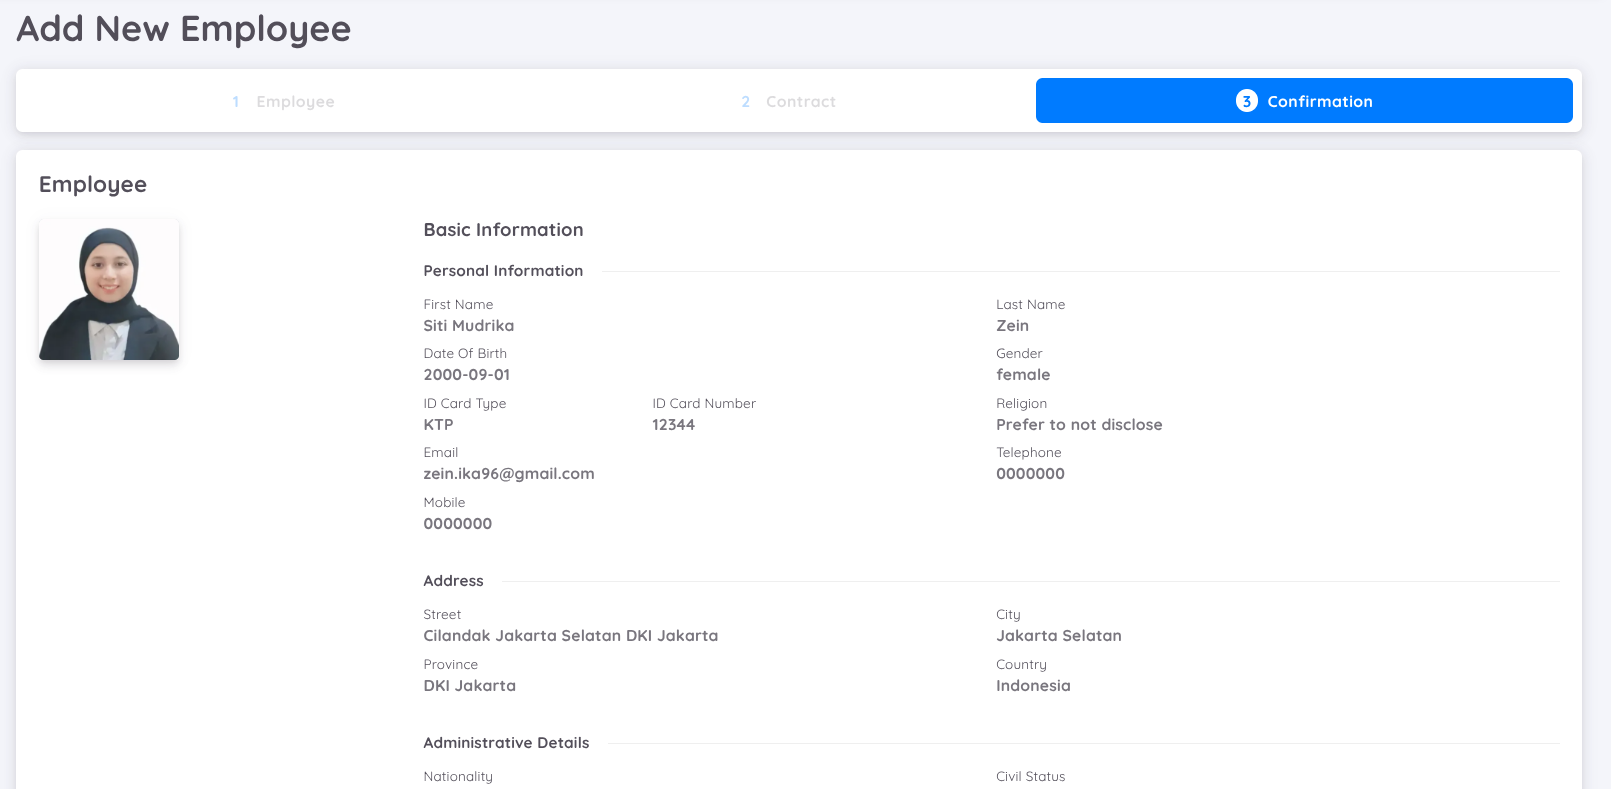
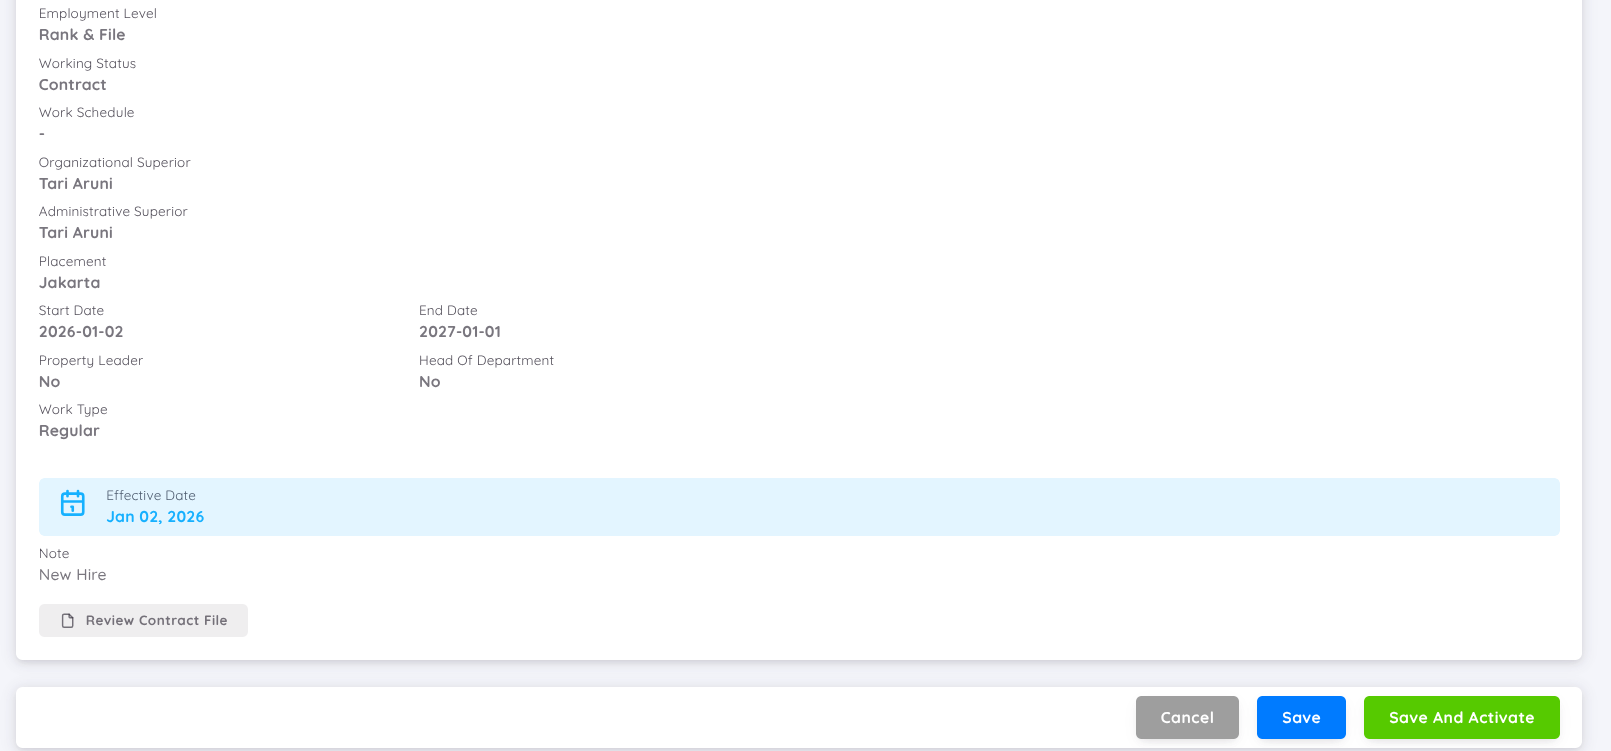
The confirmation page to add a new employee and contract details. If there are errors, users can correct the data by clicking the "Cancel" button.
There are 3 button options below:
- Cancel: Go back to the previous page.
- Save: Save the employee and contract data (the employee will not be visible in the employee list because the contract status is not active; can be seen in the Employee Milestones - Onboarding menu).
- Save & Activate: Save the employee data and activate the created contract (the employee will appear in the employee list). Then, there will be an option to create a checklist document for that employee's contract.
NOTE
Only employees with active contract status can log in from the employee page and gain access according to company settings.
Video Tutorial : How to Add a New Employee
This video explains the steps to add new employee in the system.