Loan
The Loan feature allows companies to manage employee loan requests, approvals, and repayments in one centralized place.
This menu helps ensure all financial loan transactions are properly recorded and easily monitored.
You can configure your loan setup in Configuration → Setup → Finance
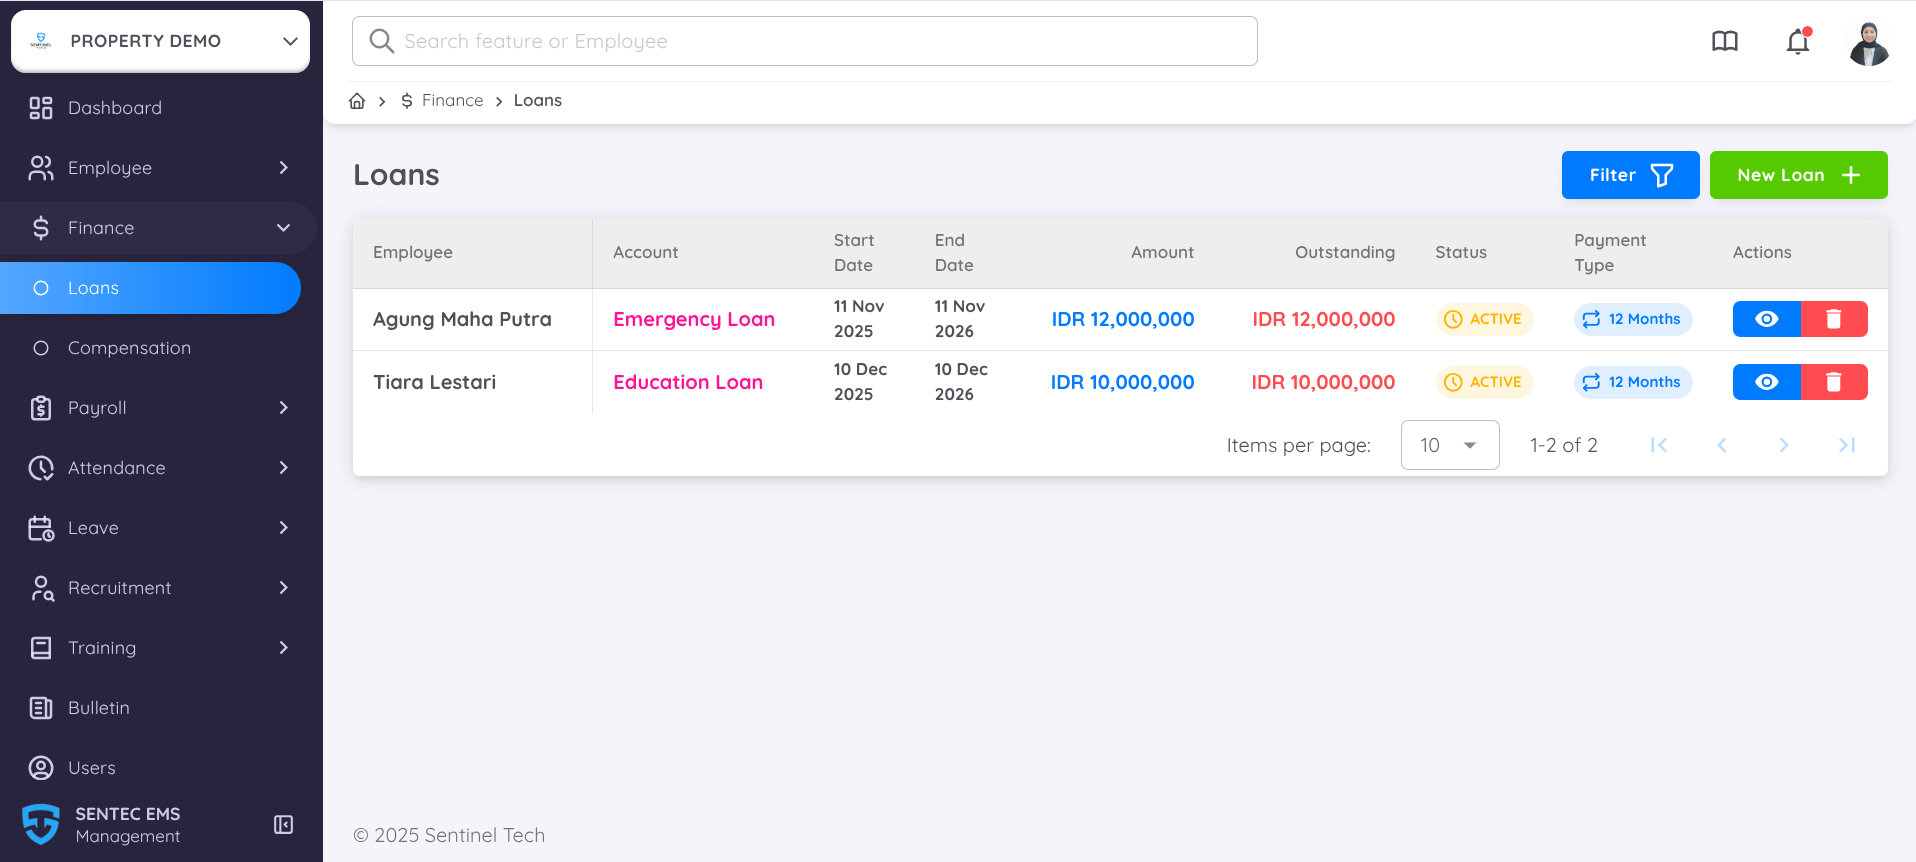
The Loans page displays a list of all employee loans with detailed information such as:
| Column | Description |
|---|---|
| Employee | Name of the employee who received the loan. |
| Account | Loan type or account (e.g., Emergency Loan, Education Loan). |
| Start Date | Date when the loan starts. |
| End Date | Date when the loan is expected to end. |
| Amount | Total approved loan amount. |
| Outstanding | Remaining balance that has not been repaid. |
| Status | Current status of the loan (e.g., Active, Completed). |
| Payment Type | Loan repayment duration or schedule (e.g., 12 Months). |
| Actions | Available actions such as View loan details or Delete the record. |
In this page you can also find the available features such as:
Filter: Allows users to search or filter loan records based on criteria such as specific employee name, loan account, status, or payment type.

Status Monitoring: Each loan includes a visual status indicator (e.g., yellow Active tag) for easy tracking.
Add New Loan
To add a new loan, click the New Loan + button to create a new loan record for an employee.
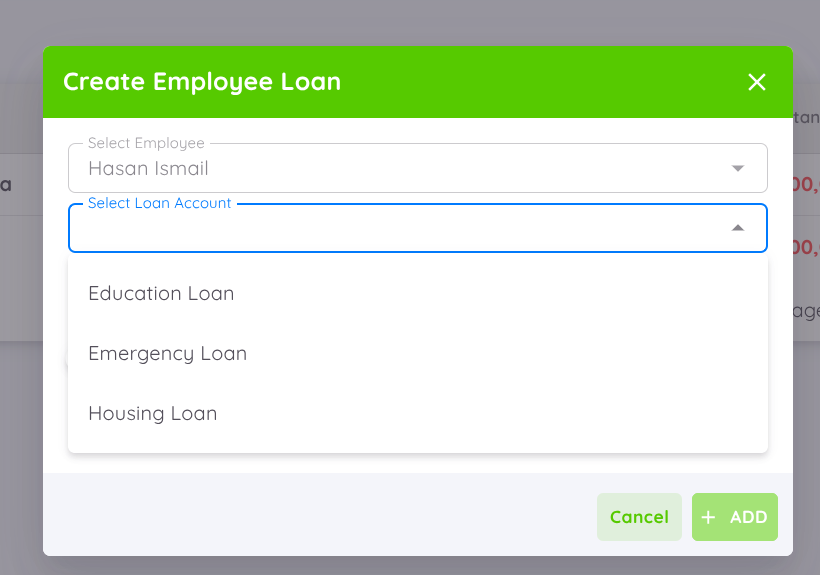
- Type the employee name — select the employee who will receive the loan.
- Select the Loan Account — choose from the available loan accounts configured in your Finance setup.
NOTE
All loans displayed here are linked to the Loan Account configured in
Configuration → Setup → Finance- Add the Loan Amount — enter the total amount to be granted to the employee.
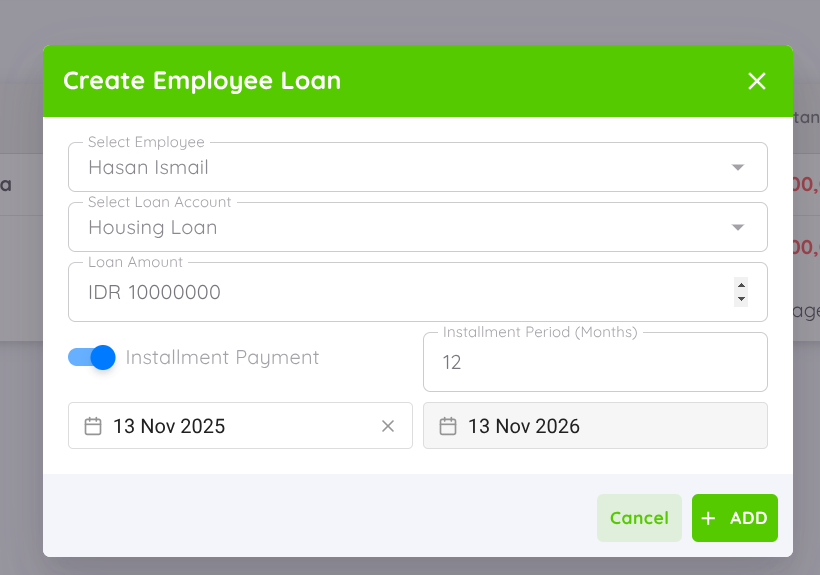
- You can enable the Installment toggle if the payment will be made in installments, then specify the installment period (in months).
If the toggle is disabled, the loan will be paid as a lump sum.
NOTE
The minimum amount, maximum amount, and installment settings must be configured first in Configuration → Setup → Finance
Loan Details
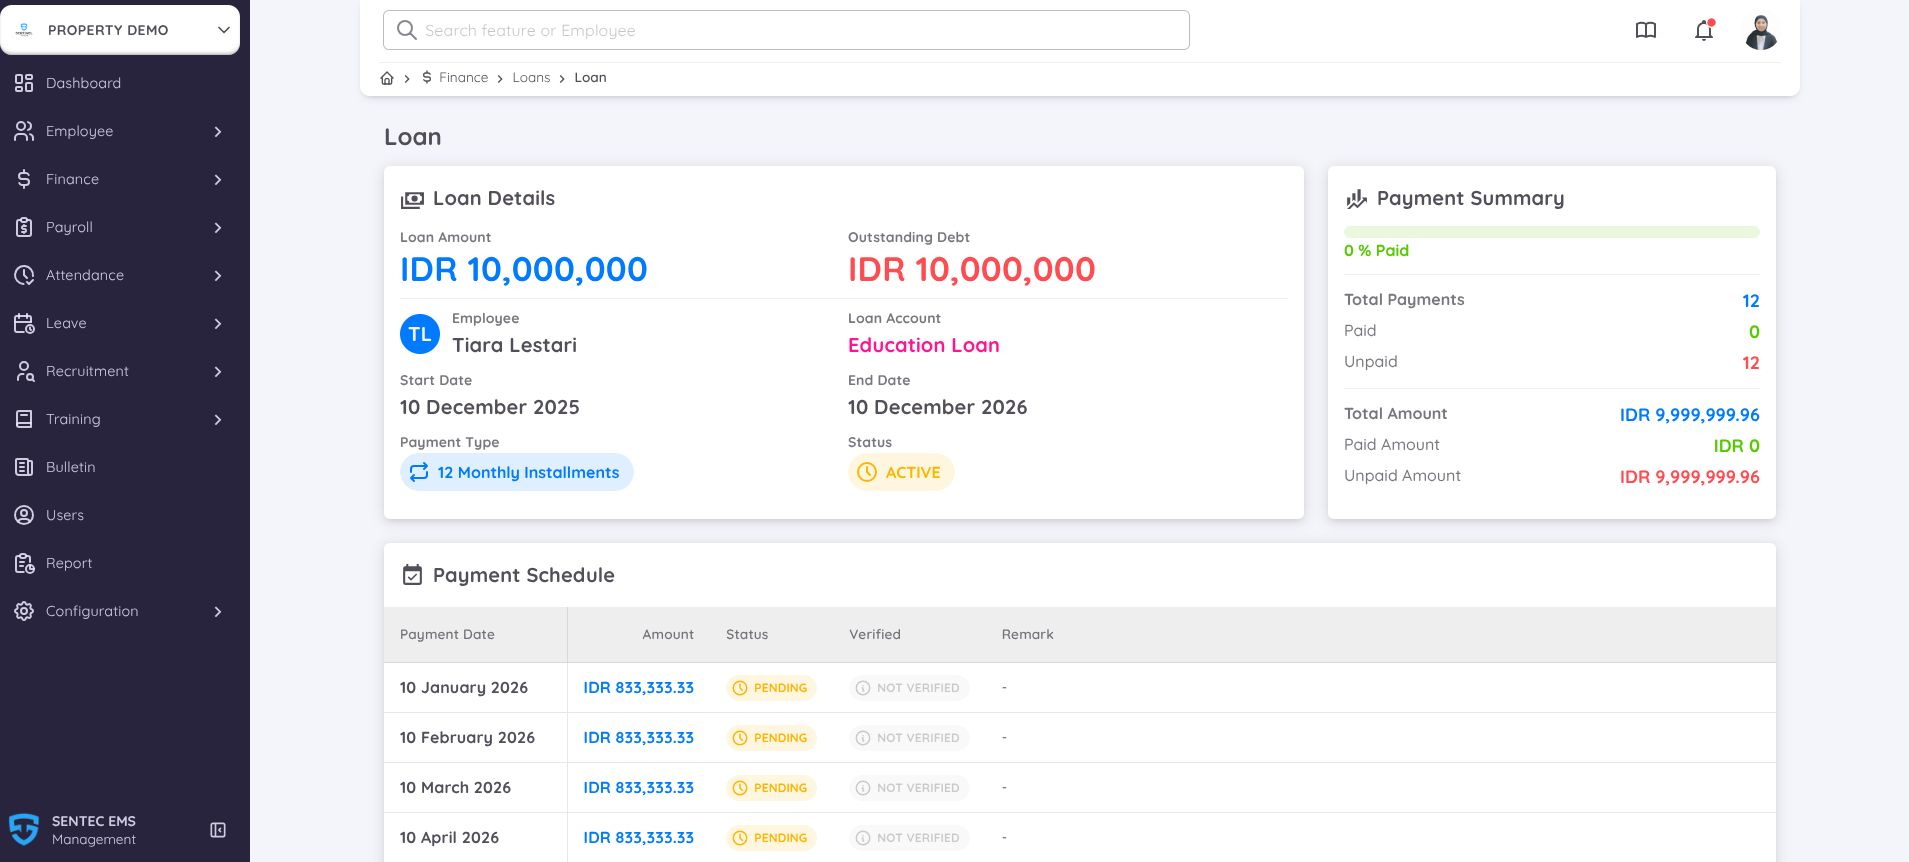
To view a loan record, click the View (👁️) icon in the Actions column of the Loan List. This will open a detailed overview of the selected employee’s loan.
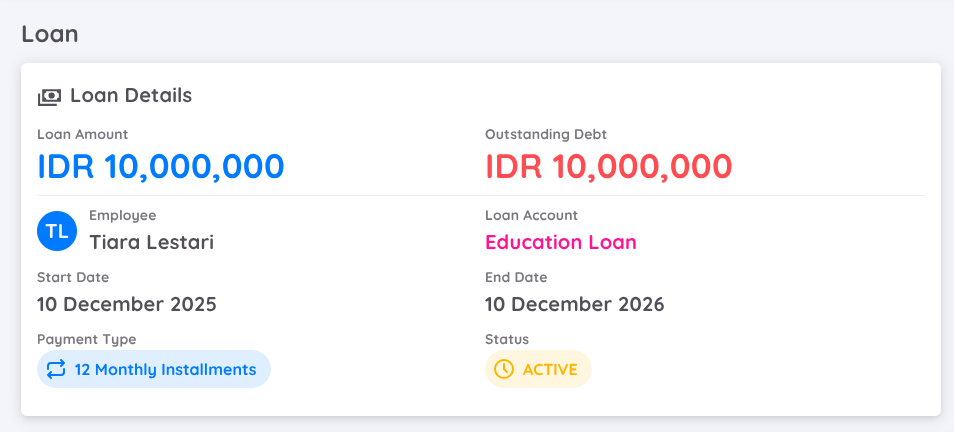
This section displays the complete information of the selected loan, including:
- Loan Amount – The total amount borrowed.
- Outstanding Debt – The remaining unpaid loan balance.
- Employee – The employee who owns the loan.
- Loan Account – Type of loan (e.g., Education Loan, Emergency Loan).
- Start Date and End Date – The duration of the loan period.
- Payment Type – Displays whether the loan is paid by installments or as a lump sum.
- Status – Shows the current status of the loan (e.g., Active, Closed).
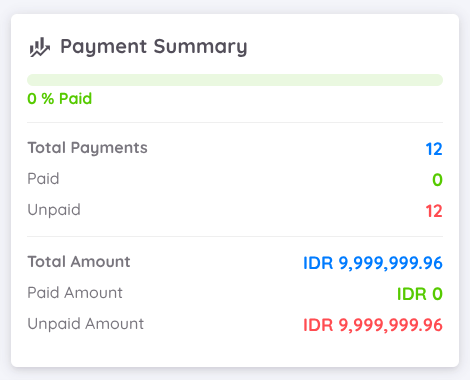
On the right side, you can see a Payment Summary panel showing key statistics:
- Total Payments – The number of payment periods.
- Paid / Unpaid – Indicates how many installments have been paid or are still pending.
- Total Amount – The full amount to be repaid.
- Paid Amount – The amount that has already been paid.
- Unpaid Amount – The remaining amount yet to be paid.
- A progress bar on top shows the percentage of total payments completed.
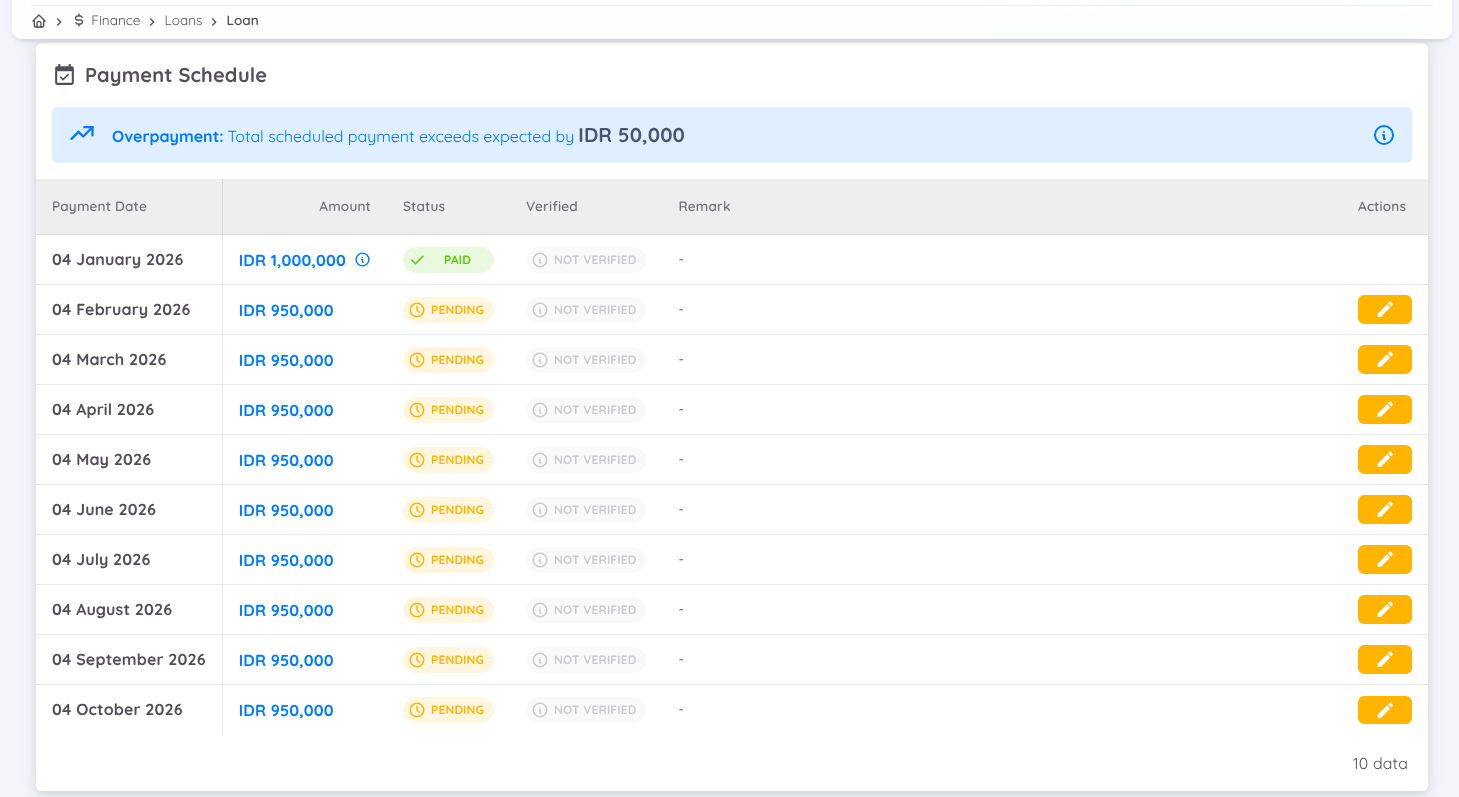
In the Payment Schedule, a notification will appear at the top of the table if there is any discrepancy. For example, when the total scheduled payment exceeds the expected loan amount, an Overpayment alert will be displayed with details such as: “Total scheduled payment exceeds expected by IDR 50,000”. This notification helps prevent calculation or data input errors.
Below the notification, the table lists all scheduled loan payments with detailed tracking for each month:
| Column | Description |
|---|---|
| Payment Date | The scheduled date for each installment payment. |
| Amount | The amount due per installment. |
| Status | Displays whether the payment is Pending or Completed. |
| Verified | Indicates whether the payment has been verified. |
| Remark | Optional notes related to each payment entry. |
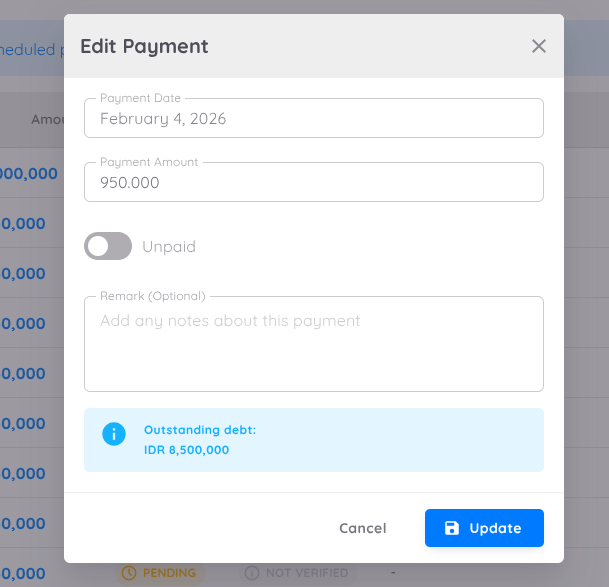
| Action | You can edit the loan details, such as the payment date, adjust the payment amount, enable the toggle if the loan has already been paid, and add updated remarks (optional). |
This section helps finance teams track loan repayment progress accurately and identify any missed or pending payments.
NOTE
If you manually edit the payment amount in the Finance menu, the change will not be automatically reflected in the Payroll. You must re-push the loan to Payroll for the update to take effect.
Delete Loan
If you need to remove a loan record, click the Delete (🗑️) icon in the Actions column.
A confirmation dialog will appear to ensure that the deletion is intentional.
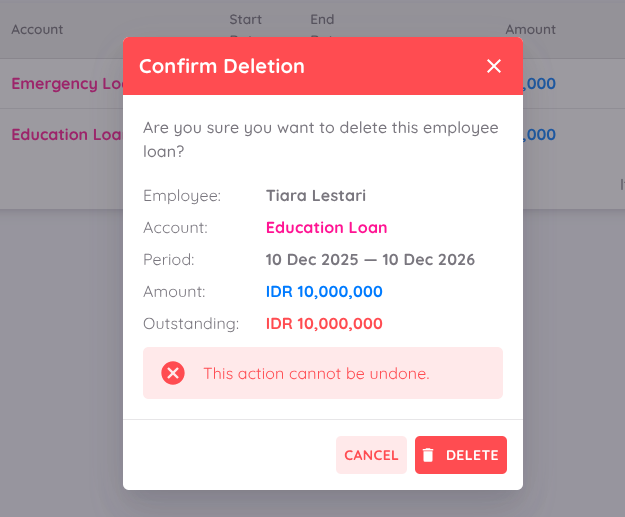
The confirmation popup will show the following loan details:
- Employee – The employee associated with the loan.
- Account – The loan type or account name.
- Period – The loan start and end dates.
- Amount – The total loan amount.
- Outstanding – The remaining unpaid amount.
⚠️ Important:
Once deleted, the loan record cannot be recovered.
Make sure you have confirmed the data before proceeding.
To proceed, click DELETE.
To cancel the action, click CANCEL.
NOTE
You can only delete a loan if it has not been processed or no payment records have been made yet.
If the loan already has active payment data, you will need to revoke or adjust it from the payment records before deletion.