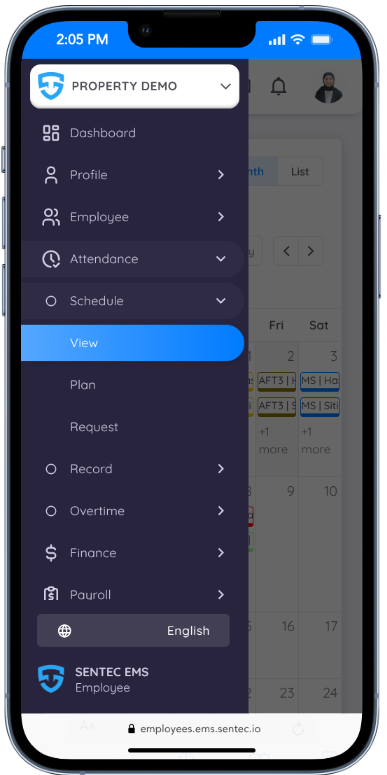
Manage Attendance
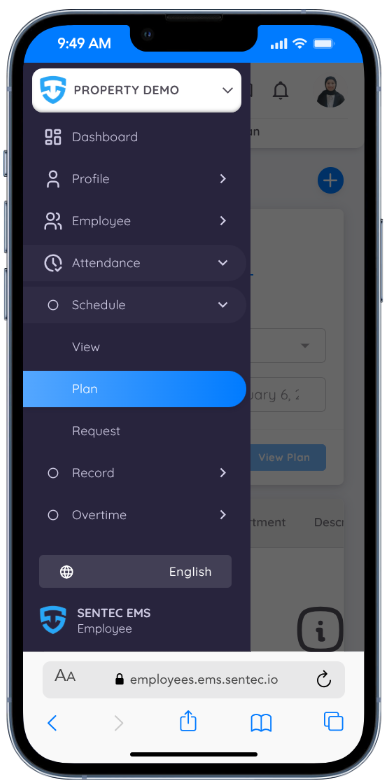
Schedule
View and manage employee work schedules for shift workers.
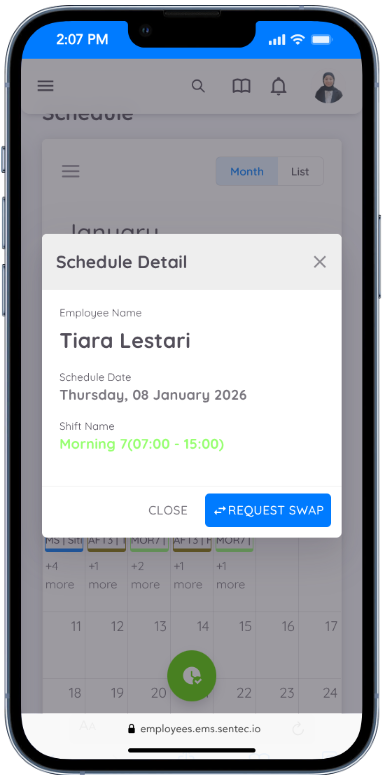
View
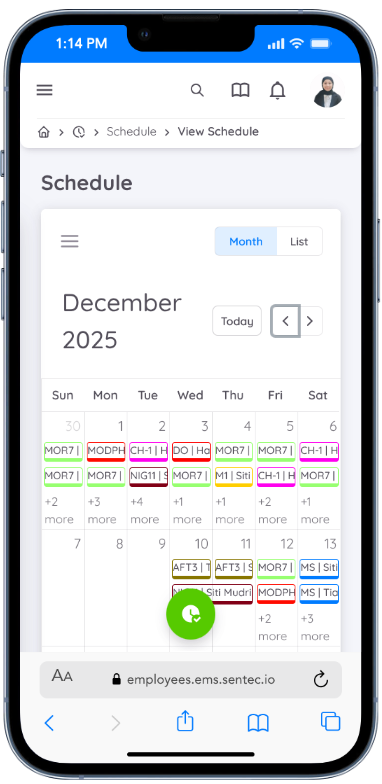
This submenu displays the work schedule for a department over a month in Calendar or List mode.
Editing
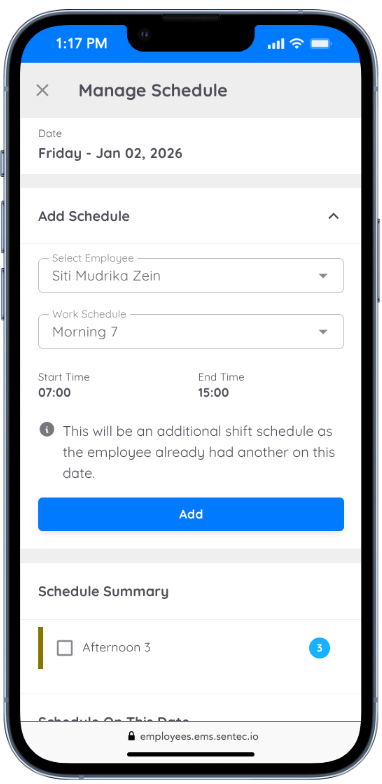
Employees serving as Heads of Departments (HOD) can modify their department's work schedule using the calendar mode. Click on a date in the Calendar, and a form will appear on the right. Select the employee and set their work schedule.
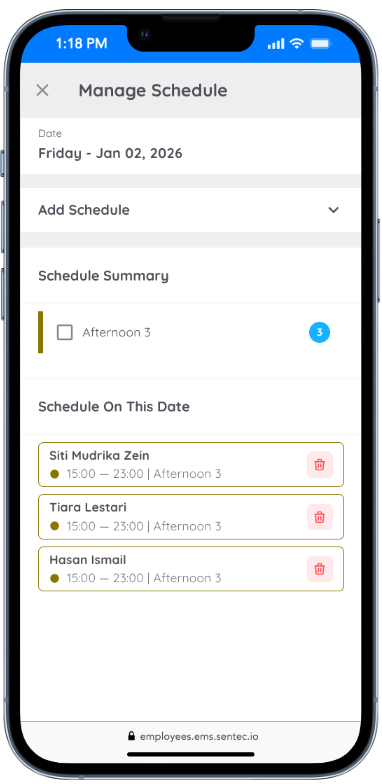
To delete a work schedule, click the "Trash" icon next to the employee's work schedule.
Creating custom work hours or separate shifts can be found here link.
Note
Past dates cannot be clicked for editing (adding or removing schedules). One employee can have more than one work schedule in a single day.
Create
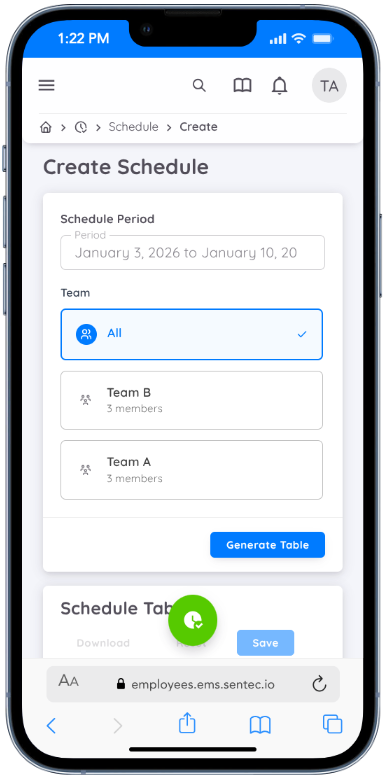
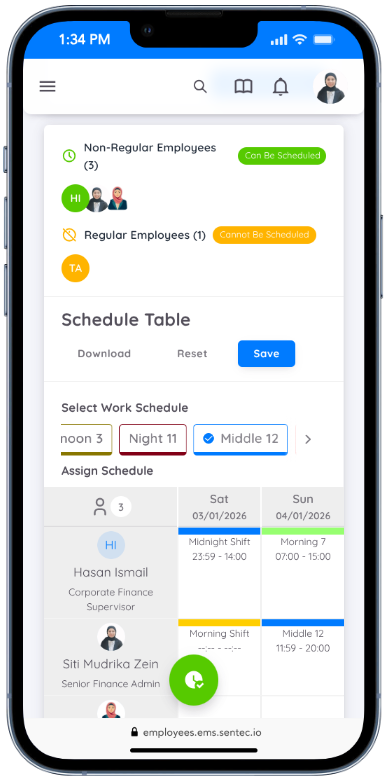
This feature is only available for employees serving as Heads of Departments. Create work schedules for their department. Specify the date range for the work schedule, click "Generate Table". Create the work schedule using the table mode. Select the type of work schedule, then click inside the table corresponding to the employee and their work date. If there is an error, or you want to change the employee's work schedule, click the type of work schedule above the table, then overlay it on the schedule you want to change in the table.
Note
Creating work schedules using table mode does not support custom work hours or giving more than one work schedule to an employee in a single day.
Plan
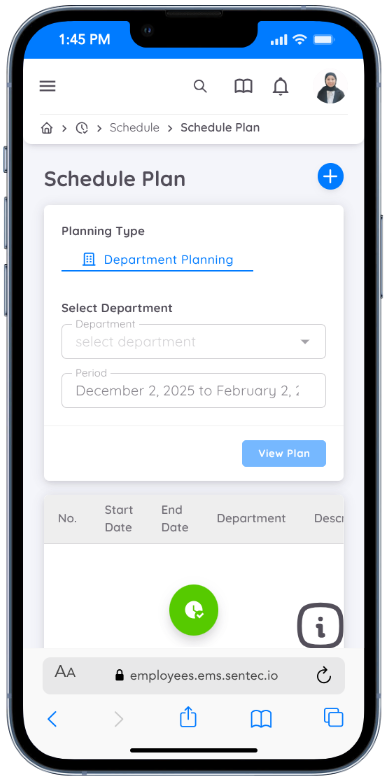
Employees with permission to create work schedules can access this menu. They may create work schedules for one or multiple departments, depending on the access granted.
The schedule creation process for a Creator is almost the same as for a Head of Department (HOD). However, planned schedules must be approved by the department head or management before they can be activated and used by employees.
Creators can create a planned schedule from the Plan menu by clicking the plus (+) button to add a new plan schedule.
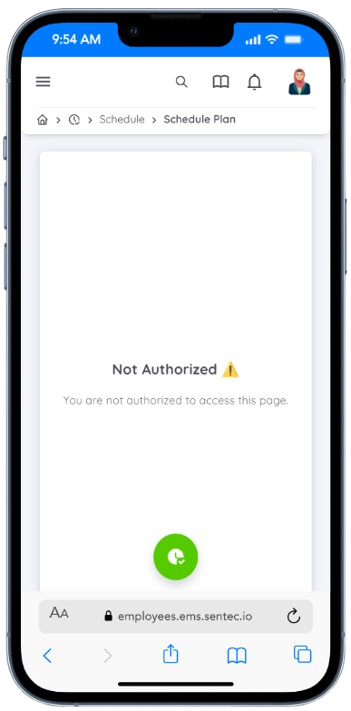
NOTE
If you are granted access, you will be able to view and use this menu. If you are not authorized, the content will not be accessible.
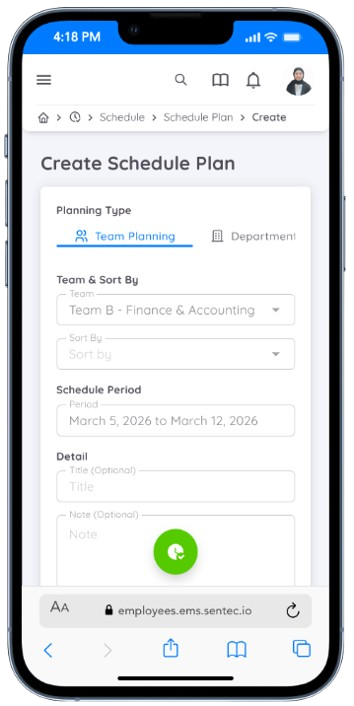
In the schedule plan form, specify the date range for the planned work schedule and select the relevant department. You may also add a title and notes if needed.
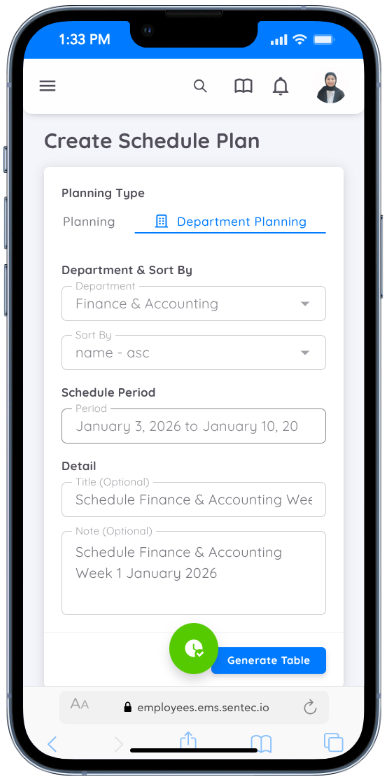
Team Schedule
You can also create a schedule for a team. However, you can only plan the team schedule if you have been assigned as the leader and schedule maker for that team.
Please note that you can only be assigned as a leader and schedule maker within your own department.
Then, enter the work schedule details by clicking and dragging them into the available table according to the employee’s name and the specified date for each table
Note
Please ensure that each time you create a work schedule, all date columns in the table are filled with the appropriate schedule. This is because the date range in the work schedule plan should not overlap. For example, if there is already a work schedule plan from May 1 to 7, and you want to create a work schedule plan from May 5 to 12, the system will reject it if the previous work schedule has not been rejected by the HOD or management.
Request
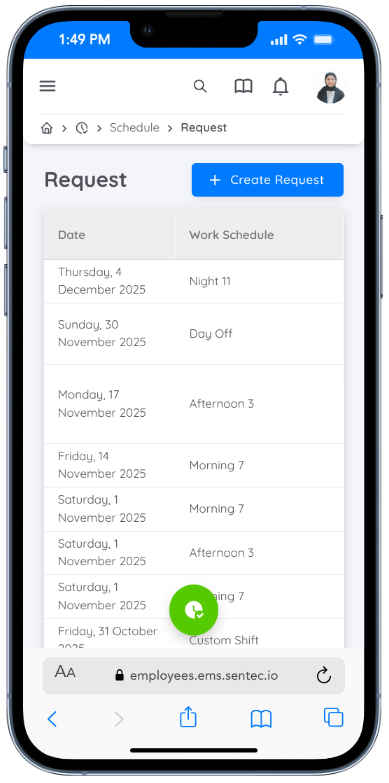
In Sentec EMS, employees can submit requests to change their own work schedule or a schedule that has been assigned to them.
There are two types of schedule requests available for employees:
- Add / Replace Schedule
- Swap Schedule
1. Add & Replace Schedule

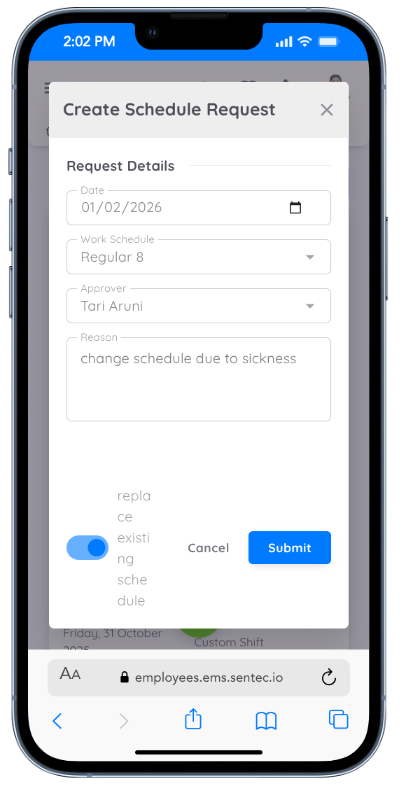
Employees can request a schedule change by clicking the Request button and filling in the required information, including:
- Date of Schedule Change
- Work Schedule
- Approver (e.g., Department Head)
- Reason for the Schedule Change
There is a toggle option that determines how the requested schedule will be applied:
Toggle Disabled (Add Schedule)
When the request is approved, the new schedule will be added to the existing schedule on the selected date.Toggle Enabled (Replace Schedule)
When the request is approved, the new schedule will replace the existing schedule on that date.
And the Approval Flow will follow:
- The employee submits the request.
- The request is sent to the Department Head for approval.
- Once approved, the requested schedule becomes active and is applied according to the selected option (Add or Replace).
2. Swap Schedule
To swap schedules, employees can access the View menu and select:
- The calendar date
- The employee name they want to swap schedules with
The swap schedule request follows this process:
- The employee submits a swap schedule request.
- The selected employee receives a notification and must approve the swap request.
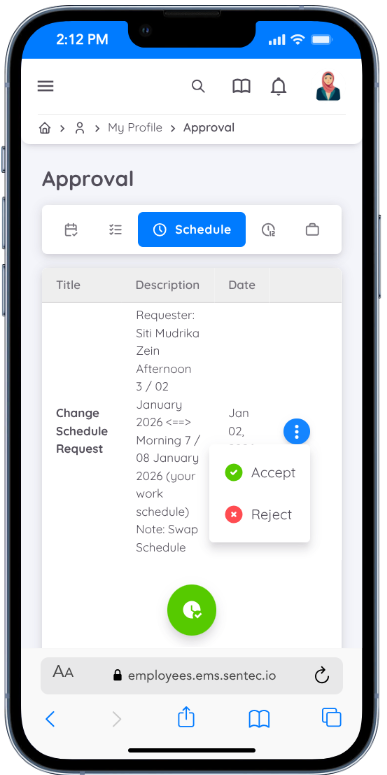
- After the second employee approves, the request is forwarded to the Department Head for final approval.
- Once approved by the Department Head, the swap schedule becomes active for both employees.
Record
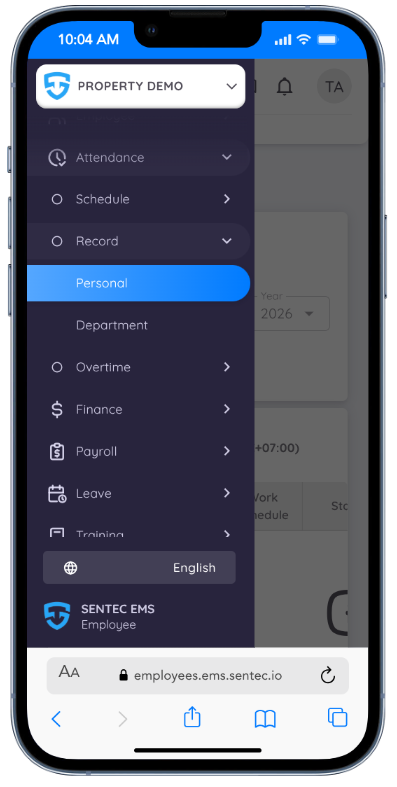
In this menu, employees can view their own attendance records through the Personal submenu.
For Department Heads, an additional submenu (Department) is available to view attendance records for their employees.
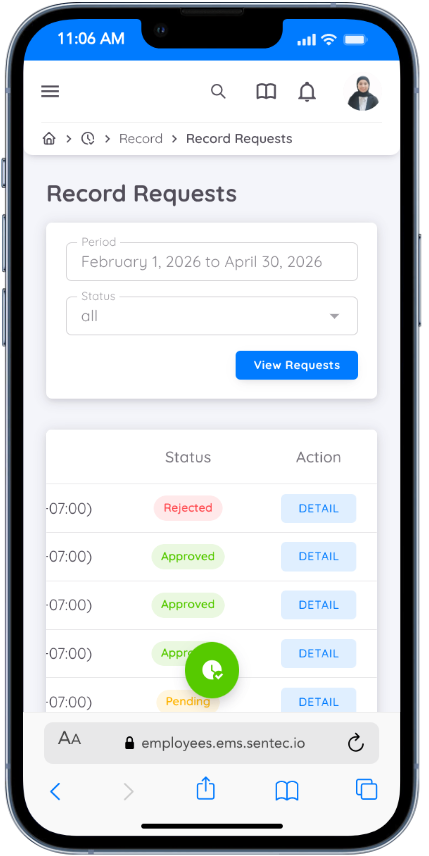
Record Requests
This page displays employee attendance record approvals based on the selected date range and status.
| Status | Description |
|---|---|
| Pending | The record is waiting for approval and has not yet been saved in the system. |
| Approved | The record has been approved and is saved in the system. |
| Rejected | The request has been rejected, and the record is not saved in the system. |
Personal
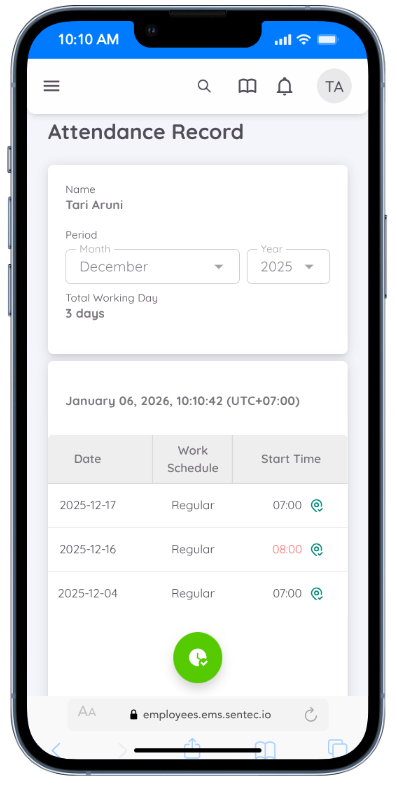
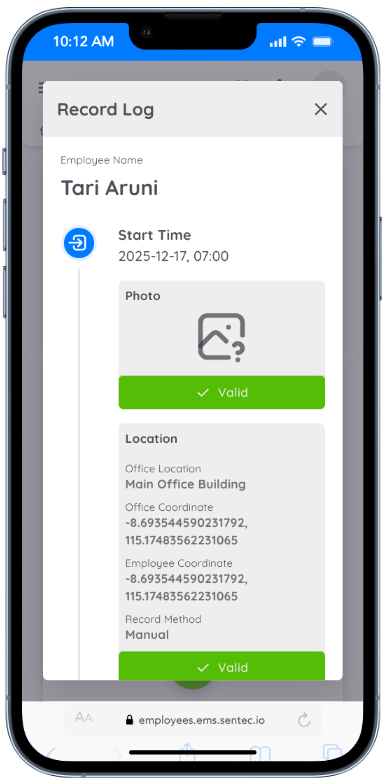
This page displays employee attendance records based on the selected date range. Employees can view and access their work hour details as well as their personal attendance log for each date.
Department
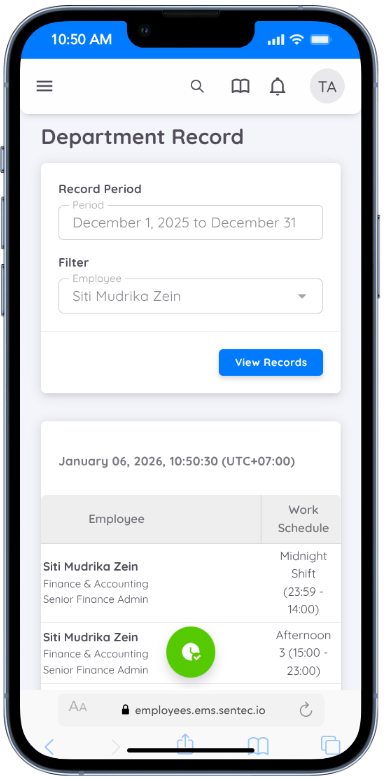
Only the Head of Department (HOD) can view attendance records for employees in the department they manage. To view these records, the HOD must specify the attendance period by selecting a date range and may optionally apply a filter based on employee name. The displayed attendance records will correspond to the selected date range
Overtime
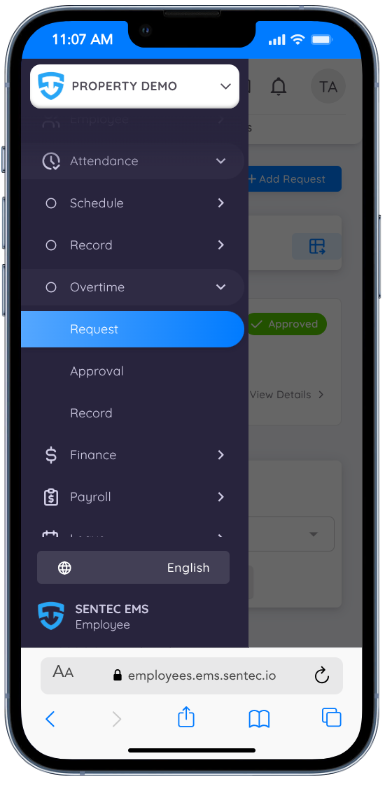
In Sentec EMS, employees can request and manage their overtime records through the Attendance menu.
The Overtime menu is available as a submenu, where employees can access the Request, Approval, and Record submenus.
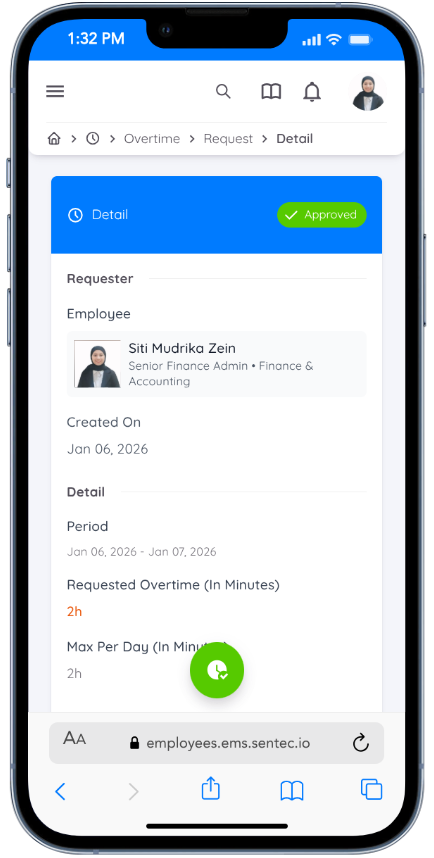
Request Overtime
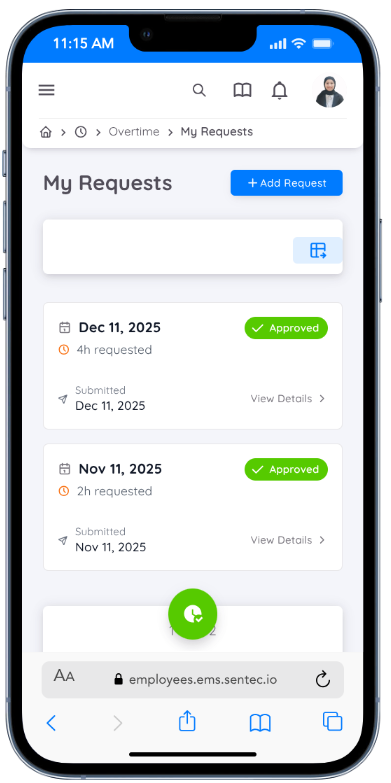
The Request submenu displays a list of your overtime requests. You can view the request details by clicking View Details, along with the status of each request (Pending, Approved, or Rejected).
To submit a new overtime request, click the + Add Request button.

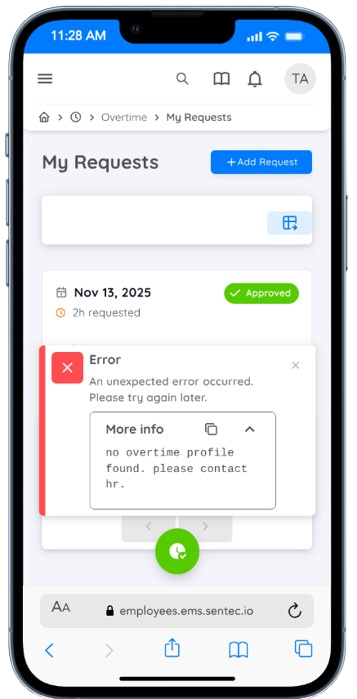
NOTE
You must be eligible to request overtime. If you are not eligible, you will not be able to submit an overtime request.
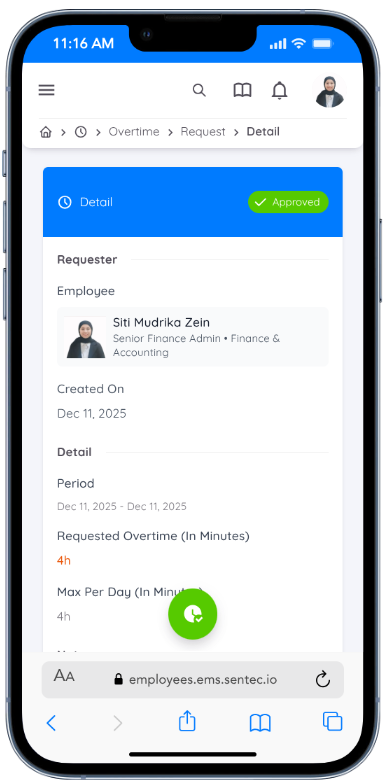
The following information is mandatory when submitting an overtime request:
Overtime Period
Select a single date or a date range, depending on your overtime request.Overtime Profile
If your property has more than one overtime calculation profile and profile selection is enabled, you must choose one. The selected profile determines how your overtime hours are calculated.Requested Overtime Hours
Specify the number of overtime hours you are requesting. The overtime calculation will follow the hours you request.Maximum Overtime per Day
The system will validate your request based on the maximum allowed overtime per day.Note / Reason
You must provide a note or reason for the overtime request.Approver
The approver responsible for reviewing your request will be displayed at the bottom of the form.
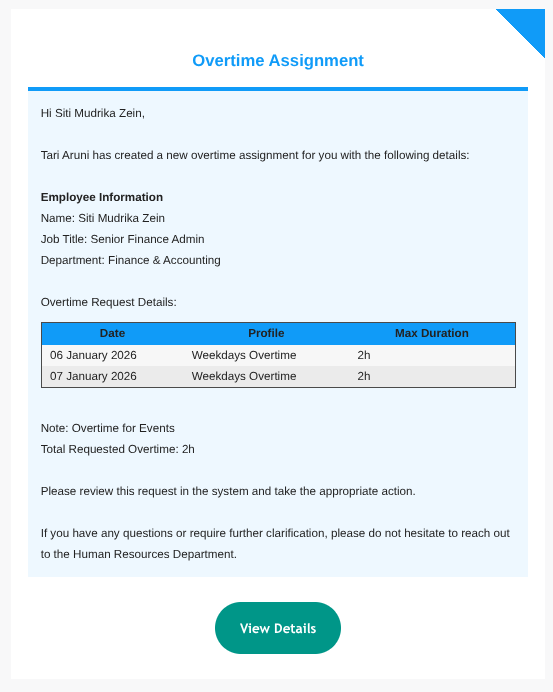
After clicking Save, your overtime request will be sent to the approver. You will receive an email notification once the request is approved or rejected.
If approved, the overtime hours will be calculated and recorded based on your clock-in and clock-out data in Sentec EMS.
Approval Overtime
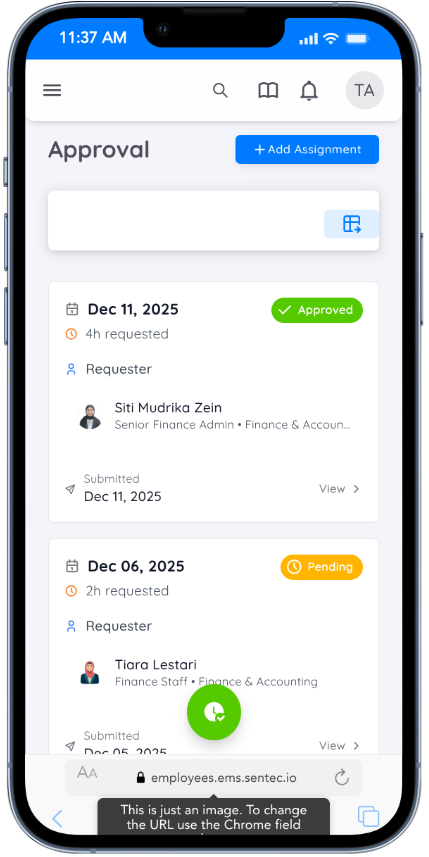
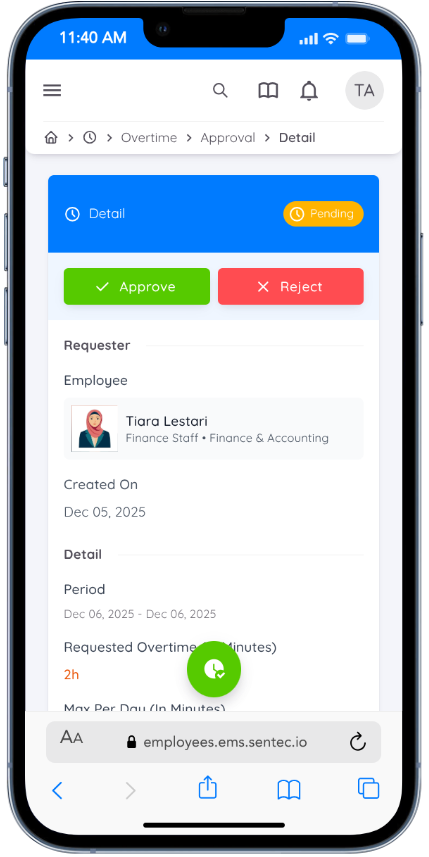
For Department Heads or approvers, this menu displays a list of overtime requests submitted by employees. You can view which requests have been approved and which are still in a pending status. Each request card shows the request date and the employee’s name.
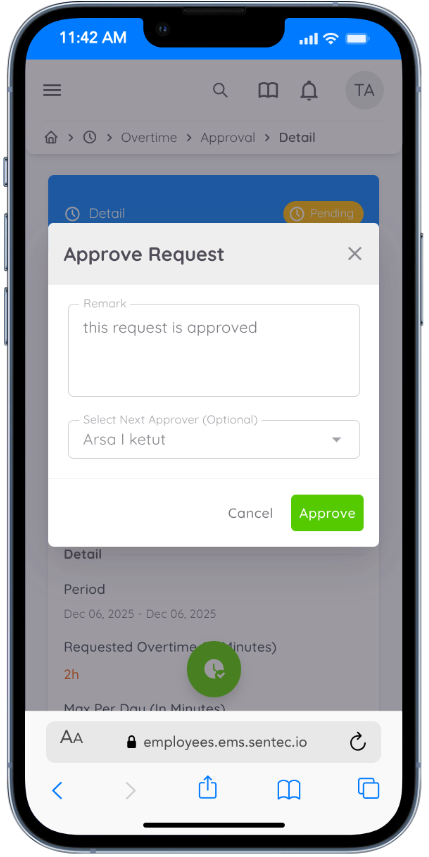
To approve or reject a request, click the View button to open the request details. From there, you can approve or reject the request.
After clicking Approve or Reject, a confirmation dialog will appear, allowing you to add remarks.
For approved requests, you can also add an additional approver. When you enter the name of the next approver, they will receive a notification to approve or reject the request.
NOTE
If you are not a Department Head or an assigned approver, this menu will be empty.
Assign Overtime
Within the Approval menu, Department Heads (HOD) will see a + Add Assignment button. This allows you to assign overtime directly to your employees.
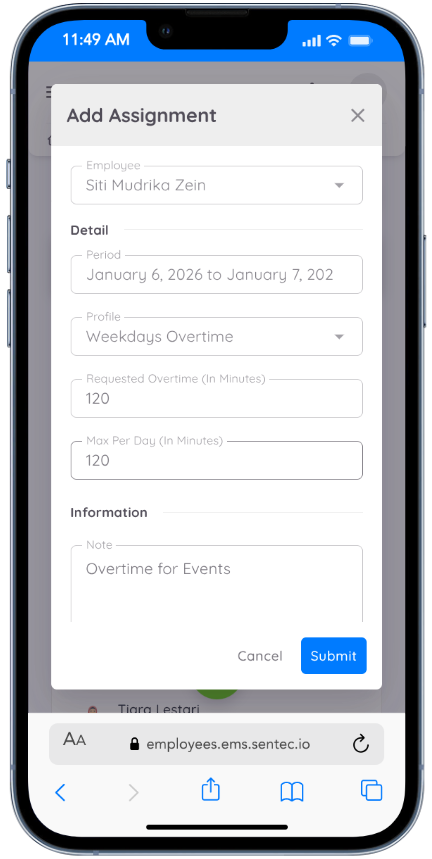
Enter the employee’s name to assign overtime to a specific employee. You must also provide additional details, such as the overtime period, overtime profile, assigned overtime hours, and a note describing the assignment.
After clicking Submit, the overtime assignment will automatically become active, and a notification will be sent to the selected employee. No further approval is required.
Overtime Record
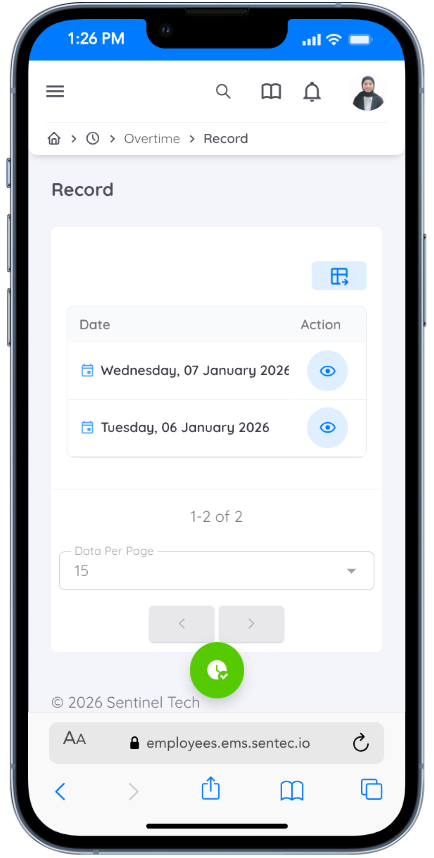
Employees can view their overtime records through the Record menu.
All upcoming overtime that has already been approved will be listed on this page.
To view the details of an overtime record, click the eye icon in the Action column.
In the detail view, you will be able to see complete overtime information, including:
- Overtime date
- Start and end time
- Claimed rate and total rate
- Overtime status
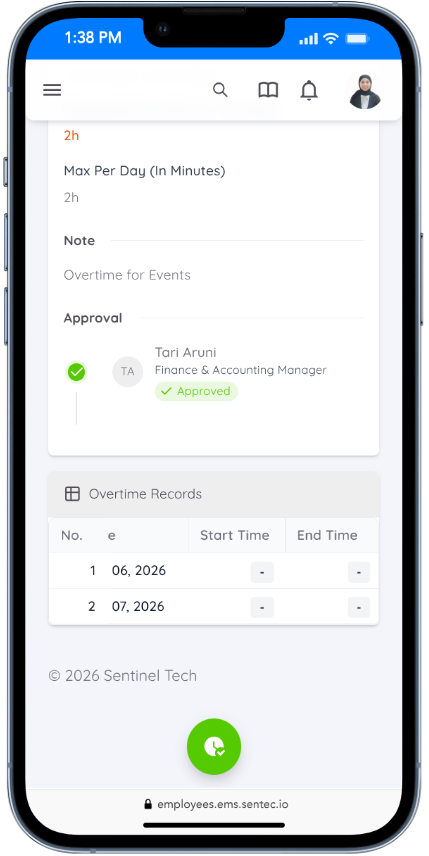
This feature allows you to easily track and review your overtime history and status.