Employee Account
![]()
Provides easy access to the Profile, Calendar, Approval, Settings, and Logout pages.
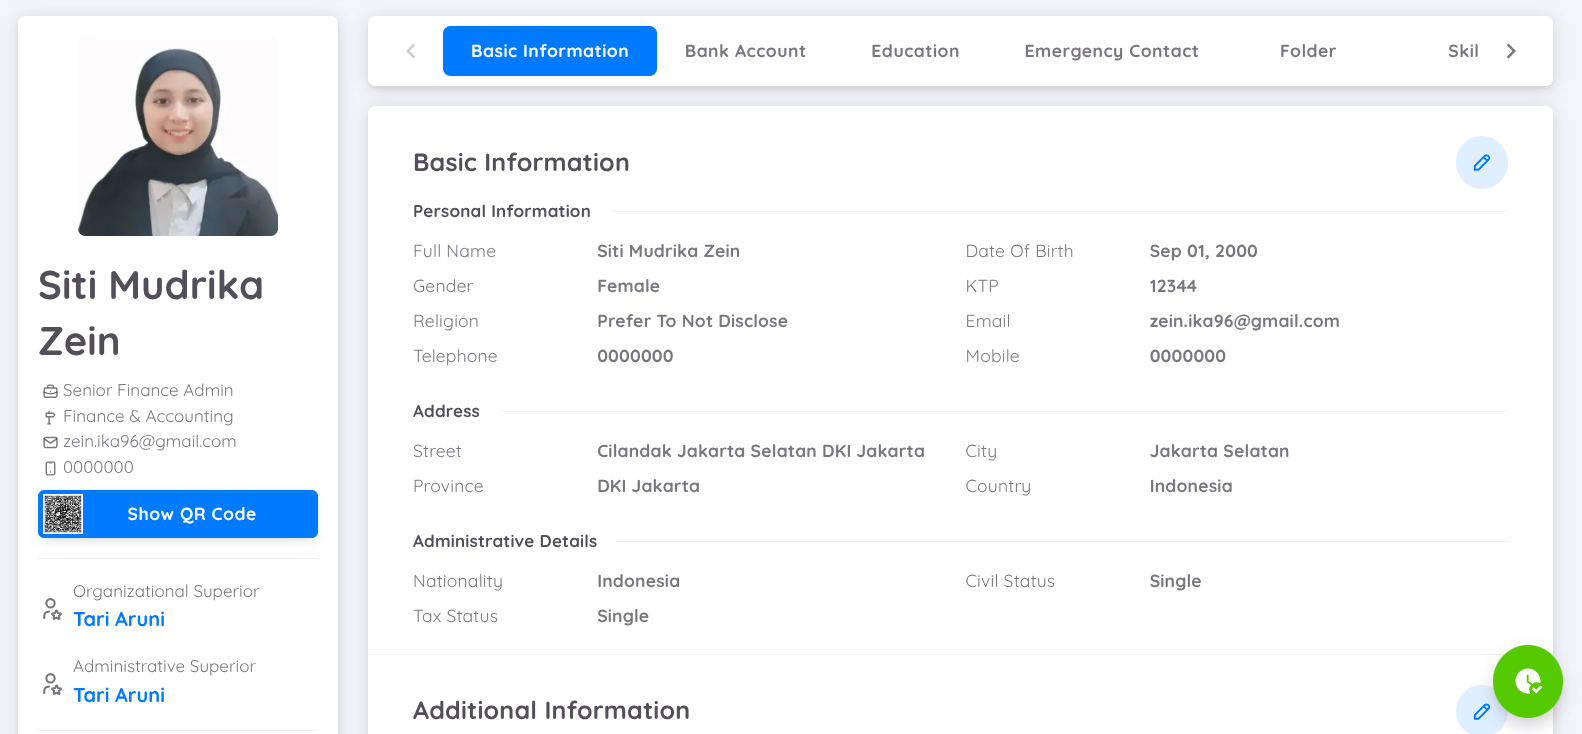
Profile
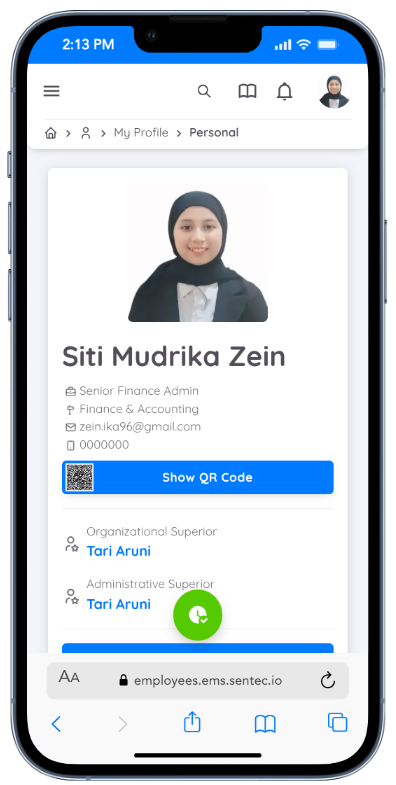
- Basic Information: View and update personal data, including basic and additional information as required by the company.
- Bank Account: Add at least one bank account and set one as the default.
- Education: Add educational details (optional).
- Working Experience: Add work experience details (optional).
- Skills: Add skills (optional).
- Emergency Contact: Add emergency contact information (optional).
- Folder: Allows employees to download personal documents provided by HR or Management and upload their own documents when enabled. All documents are securely stored and accessible from the employee’s personal profile.
- Training: View all verified training history you have joined, including the total number of sessions and training hours.
You can add and update your data by clicking the pencil or plus (+) button on each page.
My Calendar
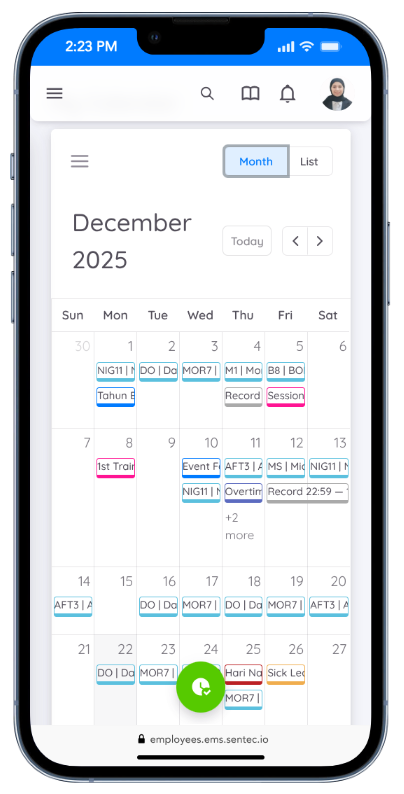
You can view your calendar in month or list format. It displays your activities for the current month, and you can use the Previous and Next navigation buttons to view calendars for past or upcoming months.
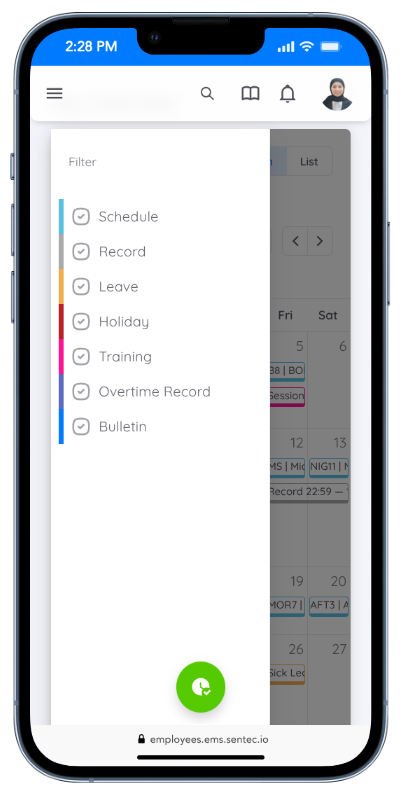
The My Calendar page displays:
- Schedule: For shift-based employees.
- Record: Record your attendance.
- Leave: View and apply for leave.
- Public Holiday: View national public holidays.
- Training: View the trainings you have registered for.
- Overtime Records: View your approved overtime requests and assigned overtime.
- Bulletin: View company announcements and updates.
Approval
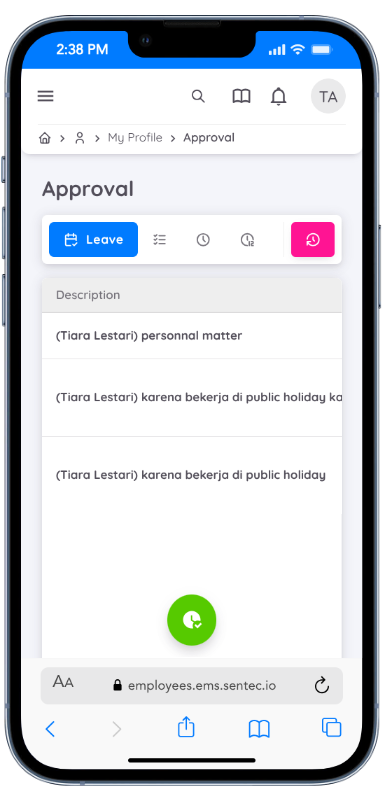
View all requests that require approval.
1. Leave

Displays leave requests submitted by subordinates. Click Detail to view the complete leave information.
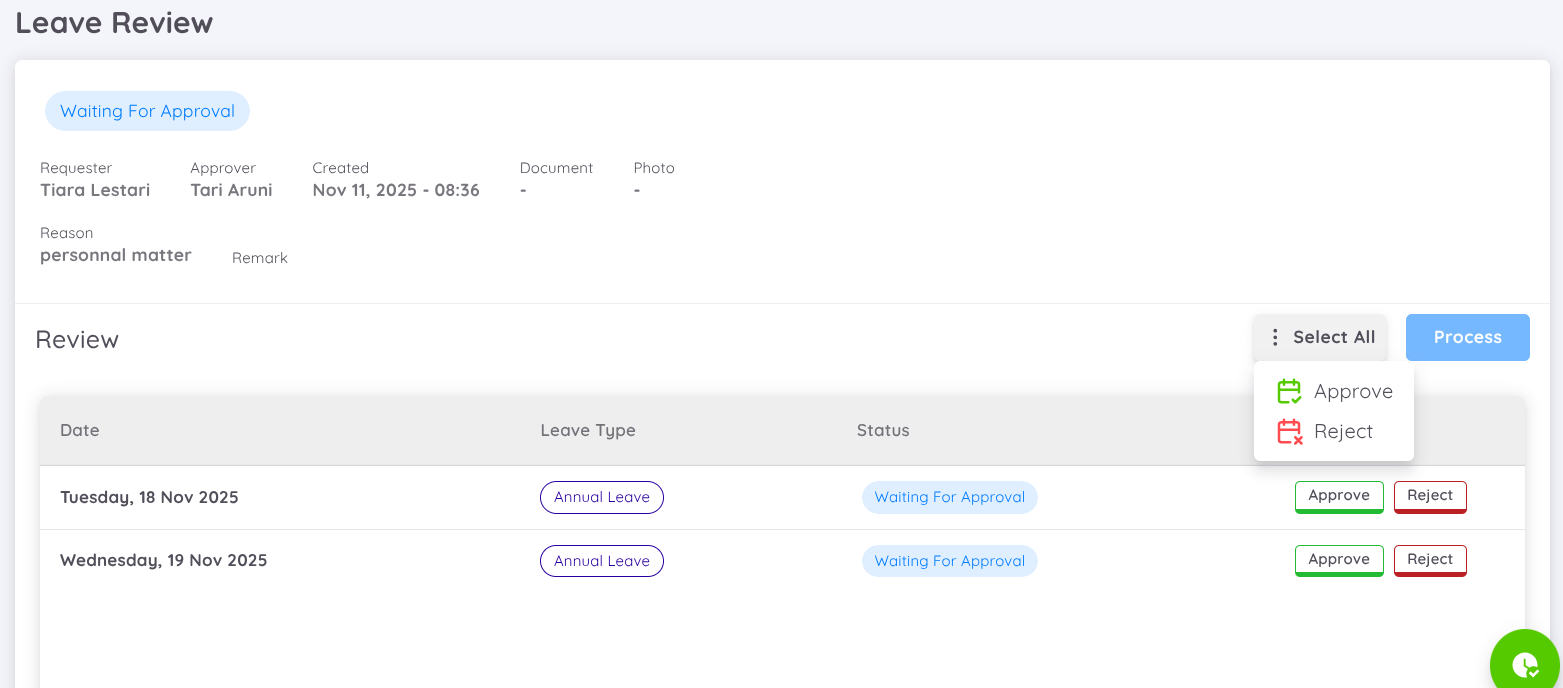
On the Leave Approval page:
- Employees with HOD (Head of Department) access can approve or reject all leave requests at once by clicking Select All, then choosing Approve or Reject.
- Alternatively, leave requests can be approved or rejected per individual date for more detailed and flexible decision-making.
- Each leave date must be marked as Approve or Reject before clicking Process to submit the final decision.
Note
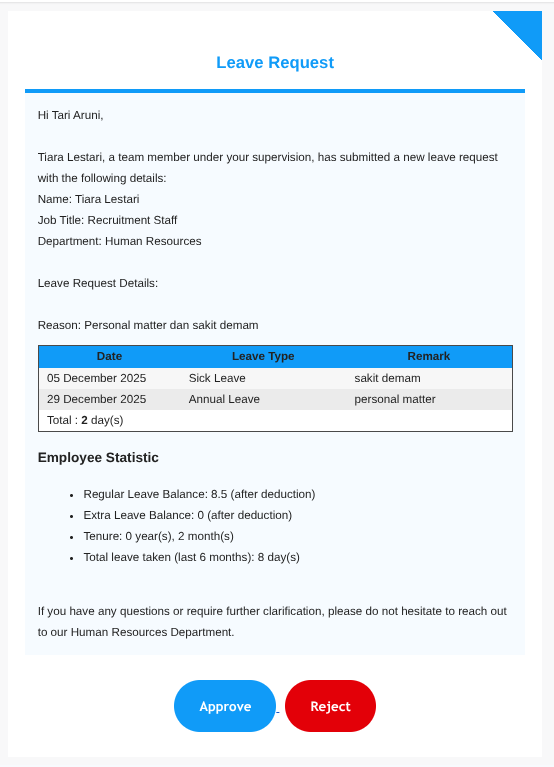
Employees will receive email notifications when leave requests are submitted by their subordinates.
Approval or rejection performed via email will apply to all leave dates in the request and cannot be processed selectively per date.
By selecting the View More button in the top-right corner, you will be redirected to the Leave Approval List, where you can view all leave requests with their statuses (Pending, Rejected, and Approved).
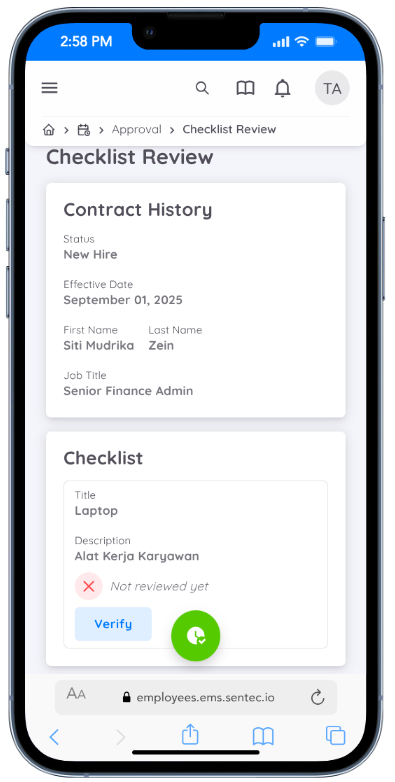
2. Checklist
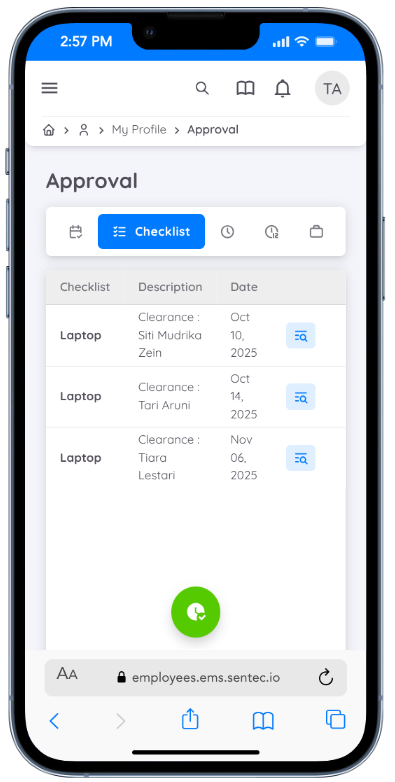
All checklists that require approval will appear on this page. There is only one available action, Verify.
If the review result does not meet the requirements, the checklist does not need to be marked as Verify.
Each checklist approval can include Remarks and supporting documents.
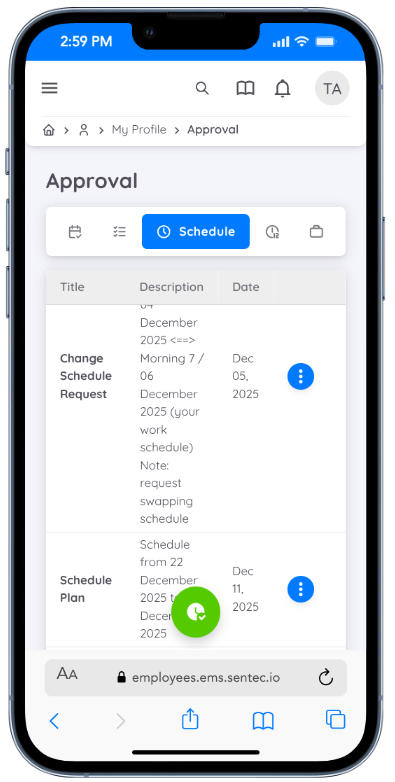
3. Schedule
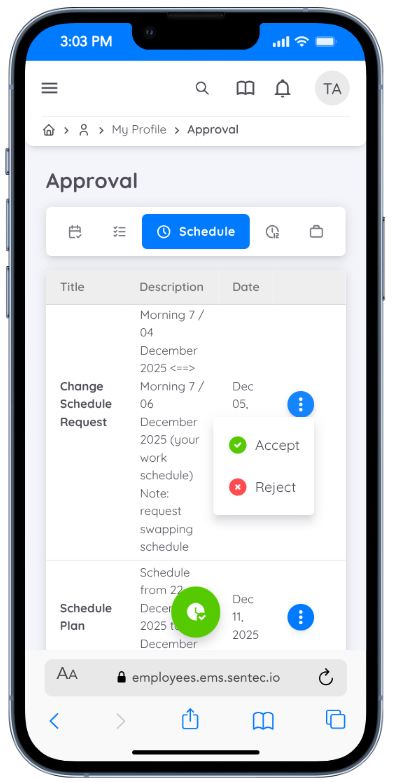
- Switch Schedule (Shift):
Accessible only to the Head of Department (HOD). Displays switch schedule requests submitted by employees.
Click the hamburger button to approve or reject the request.
- Plan:
Accessible only to the Head of Department (HOD). Displays schedule plans created by schedule creators.
Click Detail to view the detailed schedule plan page.
To approve or activate the schedule plan, click the checkmark button.
Click the X button to reject the schedule plan.
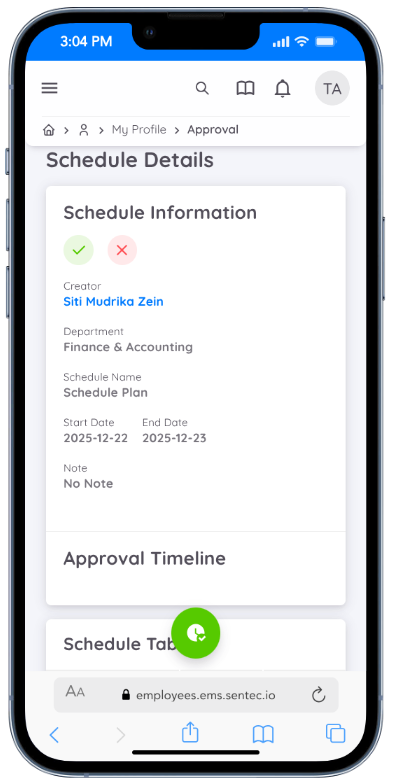
Note
Schedule plans will not appear on the calendar until they are approved by the Head of Department.
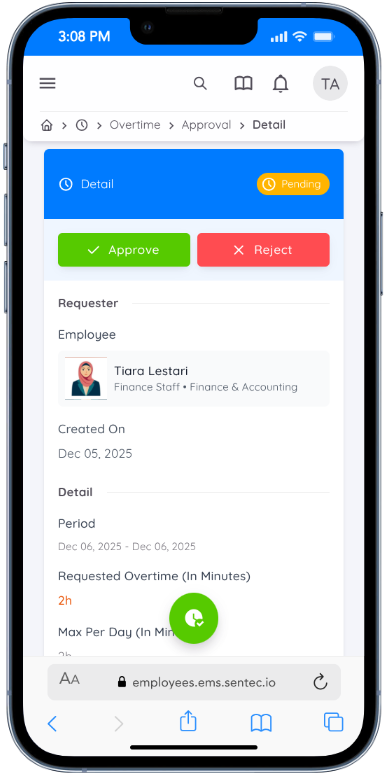
4. Overtime
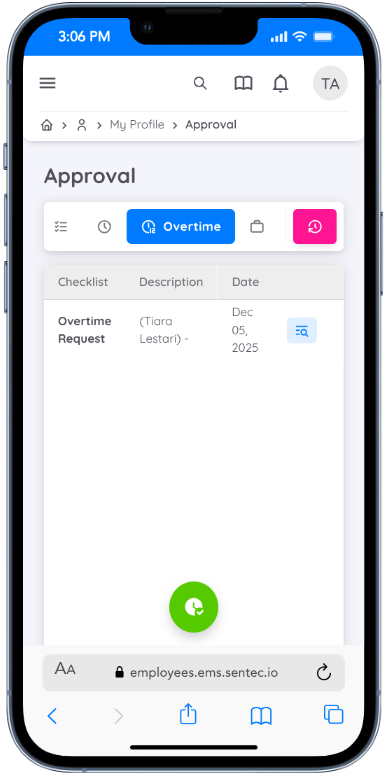
Click the Detail button to review, approve, or reject overtime requests.
5. Recruitment
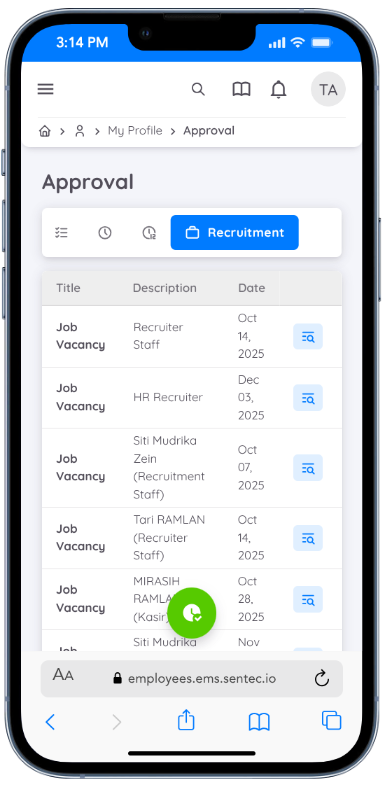
In the Approval menu of the Employee EMS application, employees assigned as Applicant Reviewers can access the recruitment review page through this feature.
Click View Details to see complete information, including job vacancy details, candidate data, and the Review column.
In the Review column, reviewers can:
- Provide a score
- Set the recommendation status (Passed, Hired, Rejected, or Failed)
- Add remarks and supporting documents
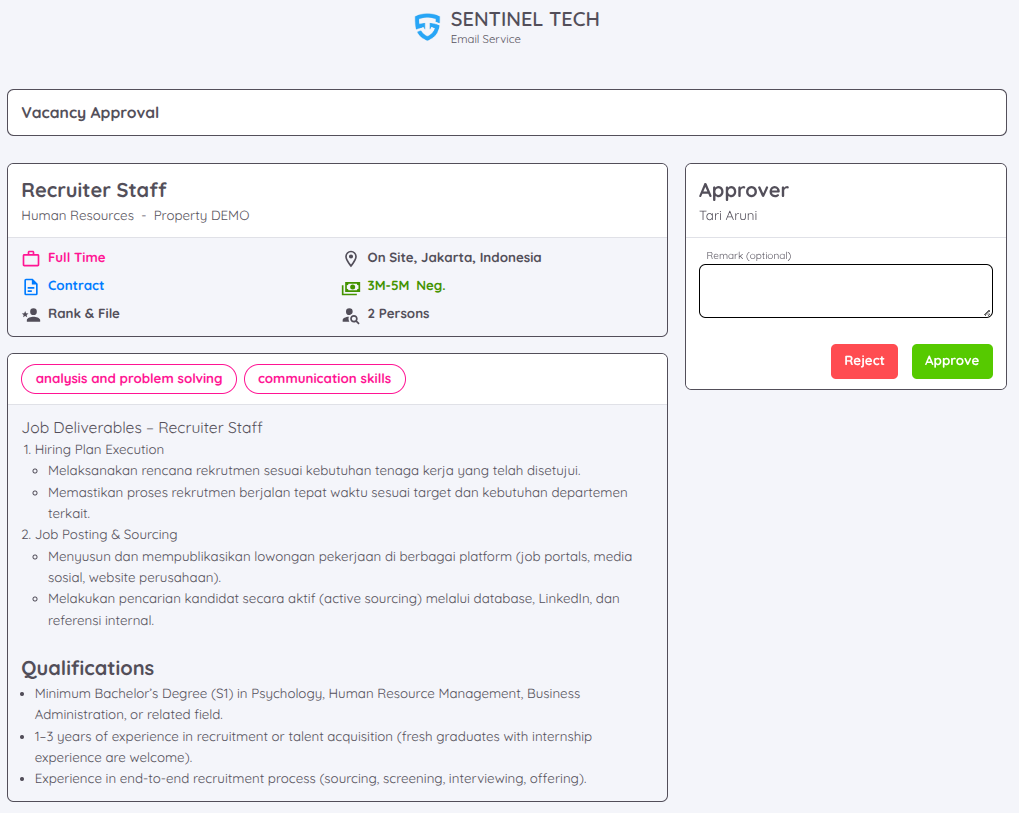
After completing the review, the reviewer can proceed by selecting Approve or Reject for the candidate.
Settings
The Settings menu in the Employee EMS application allows employees to manage two key features related to personal data visibility and approval processes:
- Show/Hide Personal Data
- Approval Delegation
- Show/Hide Personal Data
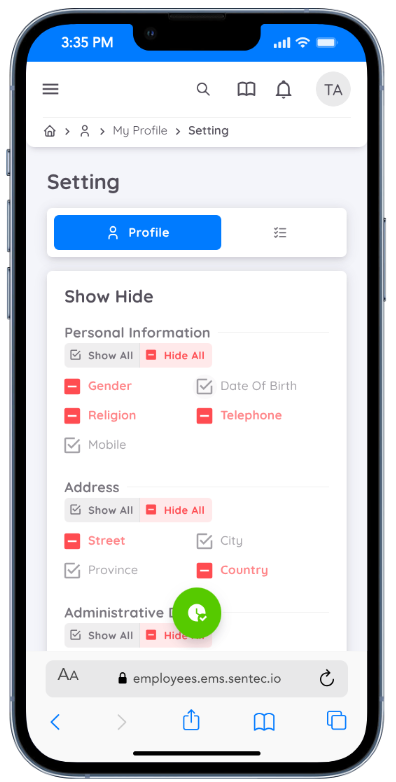
This feature allows employees to control the visibility of their personal data in the employee list. Employees can choose which information to display or hide as needed.
How to Use:
- Go to the Settings menu from the Profile Account
- Select the Profile tab
- Check the box to display data or uncheck it to hide data
- Click Save to apply the changes
Note
Some data cannot be hidden, including First Name, Last Name, ID Card Number, and Personal Email Address.
This setting is permanent and cannot be modified.
- Approval Delegation
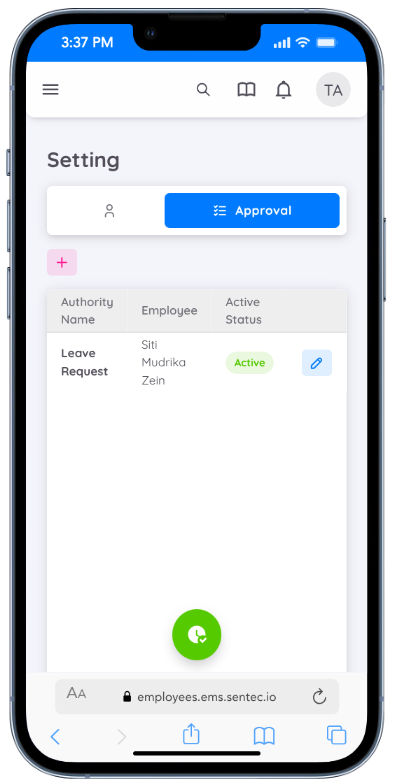
This feature allows employees with approval access to delegate their approval authority to another employee.
Delegation is useful when the original approver is unavailable due to leave or other circumstances.
How to Use:
- Go to the Settings menu from the Profile Account
- Select the Approval tab
- Click the + button
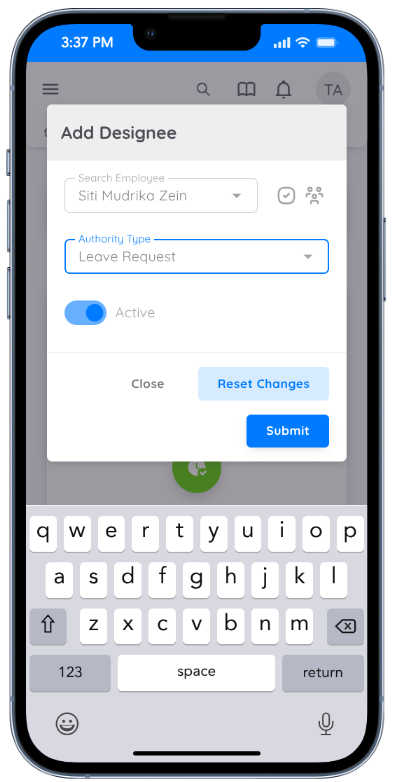
- The Add Designee form will appear
- Enter the employee’s name (click Search within the Organization if the employee is registered outside the property) and select the appropriate Authority Type
- Toggle the Active status
- Enable the Designee option and click Submit to save the data
Note
Only one employee can be assigned as an approval delegate at a time.
The delegated employee will receive an email notification and can approve requests on behalf of the original approver.
Delegation can be revoked at any time by the original approver.
With this quick-access feature, managing profiles, calendars, and approvals becomes more efficient and convenient.