Overview
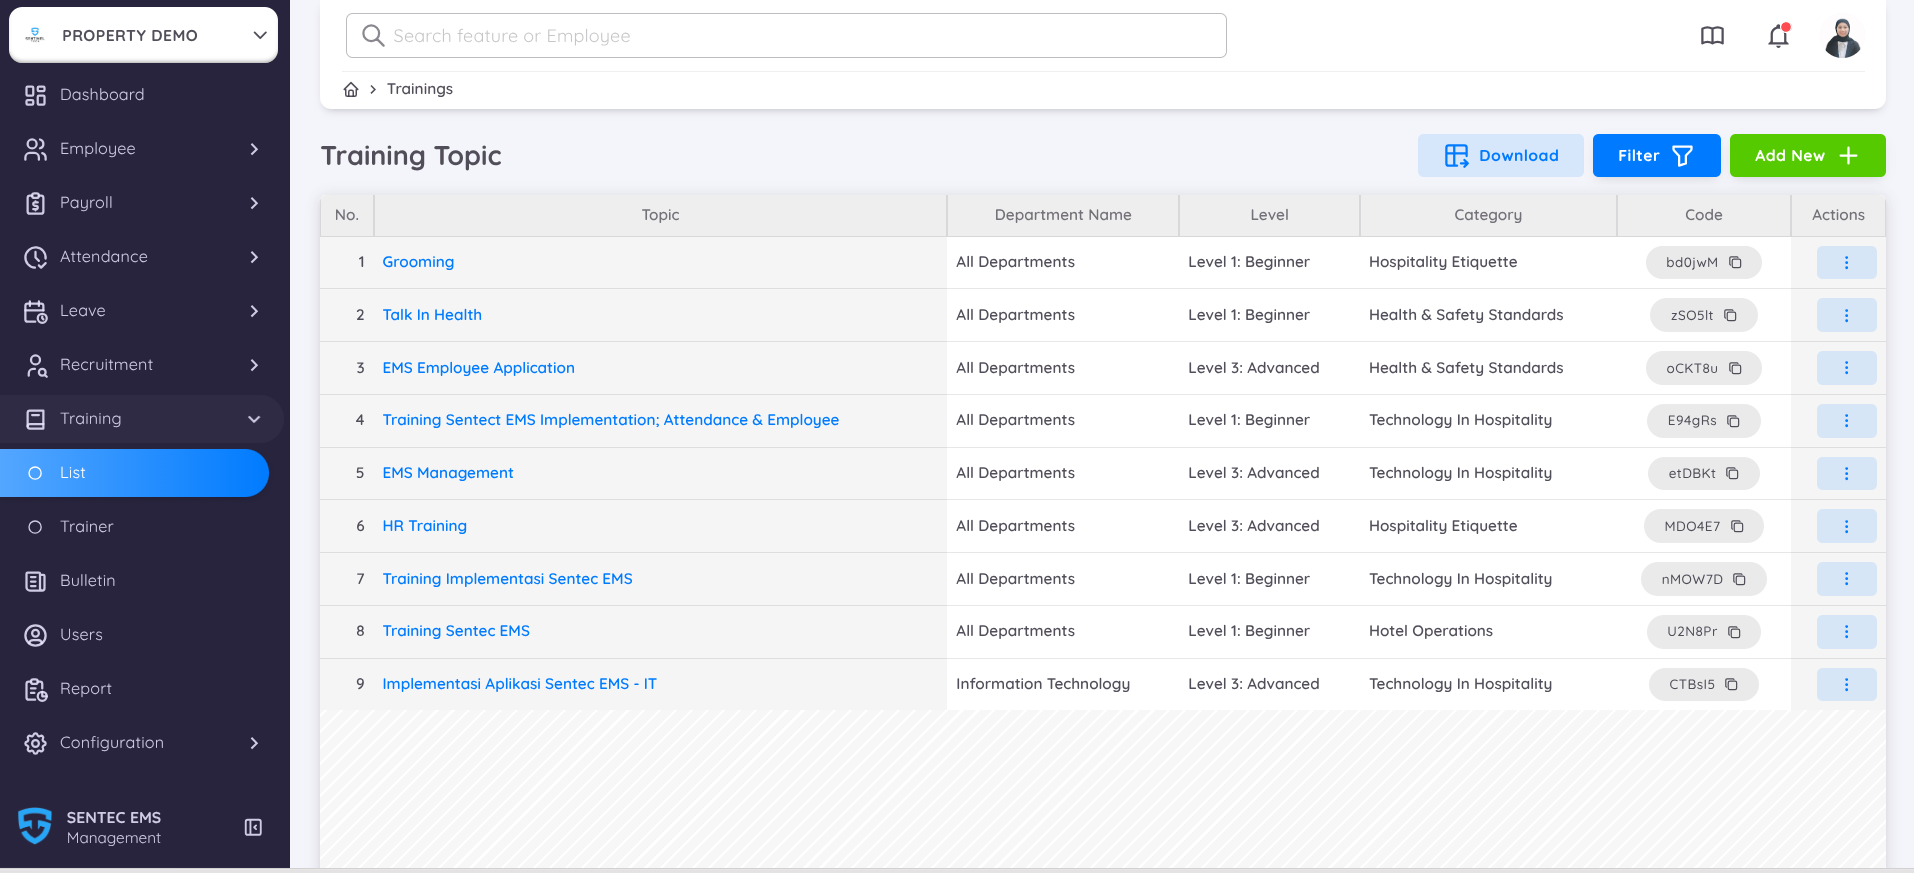
The Training Topic list page allows you to view, manage, and organize all available training programs within your property. Each topic listed includes key information such as Department, Level, Category, and unique Code to help you identify and manage training sessions effectively.
This feature provides an overview of all training materials available to employees, supporting better planning and coordination between departments.
Training Topic Lists
The page displays a list of existing training topics, including the following details:
- Topic – The name of the training.
- Department Name – Indicates which department(s) the training applies to.
- Level – Represents the training complexity or target skill level (e.g., Beginner, Intermediate, Advanced).
- Category – Classifies the type of training, such as Technology, Health & Safety, or Hospitality.
- Code – A unique identifier for each training topic, automatically generated after you create a new training topic.
From the Actions column, you can:
- View Details – Review topic details before making changes.
- Edit – Update training topic details.
- Delete – Remove a topic if it is no longer relevant.
In this menu, you can use the Add New + button to create a new training topic or apply filters based on the training topic name and/or period to locate specific items quickly. The Download option is also available, allowing you to export the list for reporting or record-keeping purposes.
Create New Training Topic
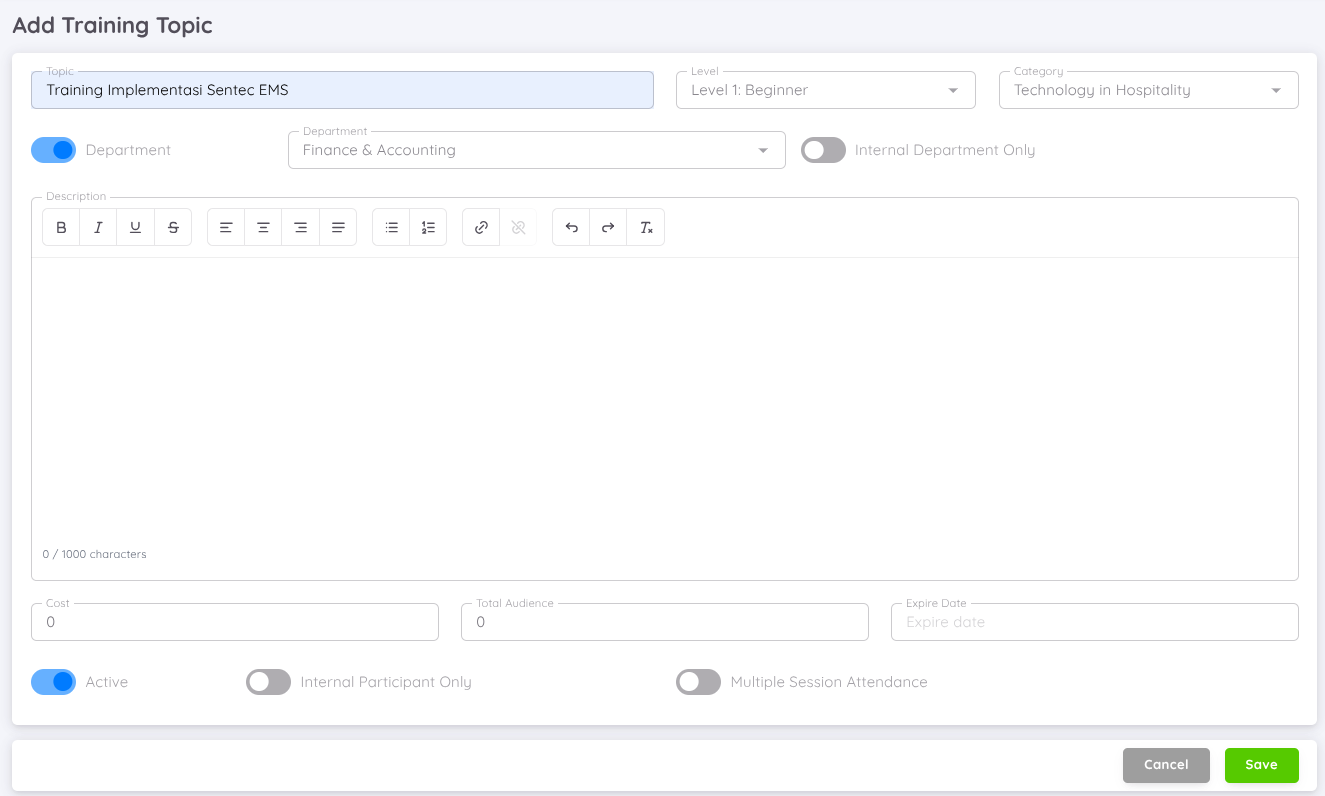
The Add New + page allows administrators or authorized users to create new training topic that will be available for employees within the organization. This feature ensures that all training initiatives are well-documented, categorized, and easily accessible.
You can also define or activate the optional settings that include:
- Topic – Enter the title of the training session.
- Level – Select the training level such as Beginner, Intermediate, or Advanced.
- Category – Choose the appropriate training category (e.g., Technology, Health & Safety, Hospitality).
- Department – Disable the toggle if the training applies to all departments. When enabled, you can specify a single department and select the applicable department. However, participants from outside the selected department can still join by enabling the toggle option next to the department selection.

- Description – Provide a detailed explanation of the training topic, including its objectives, materials, or expected outcomes.
- The rich-text editor allows text formatting and link insertion for better clarity.
- Cost – Specify the training cost if applicable.
- Total Audience – Indicate the expected number of participants.
- Expire Date – Define the end date or expiration date of the training topic.
You can also define or activate the optional settings that include:
- Active – Enable this option to make the training topic visible and available for use. If disabled, it will remain as a draft.
- Internal Participant Only – Restrict the training to internal employees only when enabled.
- Multiple Session Attendance – Allow employees to attend multiple sessions of the same training when this option is enabled.
Once all required information is entered, click Save to create the training topic. The new topic will automatically appear in the Training Topic List and can be managed or edited as needed. Click Cancel if you wish to discard the changes and return to the listing page.
Training Topic Details
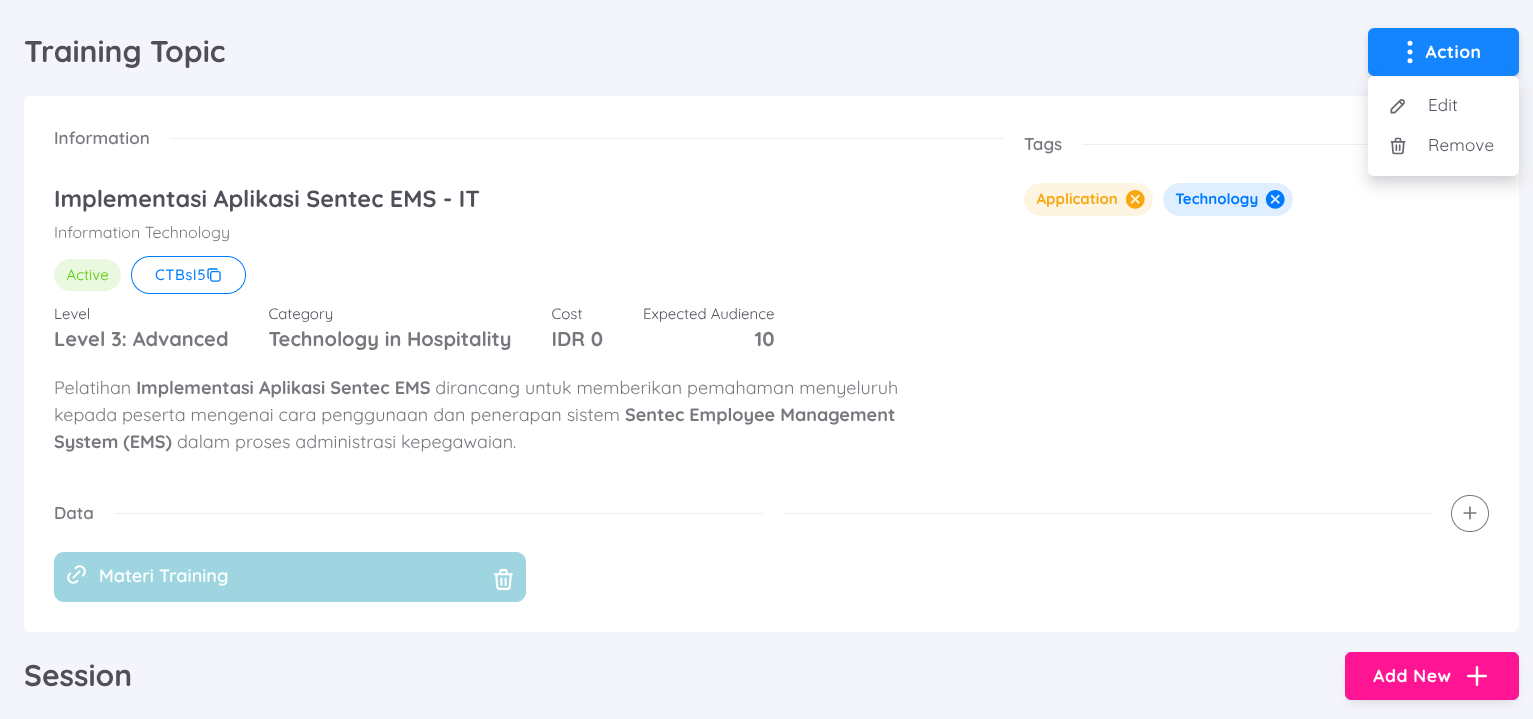
The Training Topic Detail page displays comprehensive information about a specific training program, including its description, department, level, and audience. From this page, you can also manage related sessions where employees can register and join.
To add or view more details, click the training topic name in the Training Topic Listing.
In this menu, you can add details such as tags to specify and categorize the training (e.g., Application, Technology, Health & Safety). You can also upload additional data such as training materials, documents, or references, and manage training sessions directly from this page.
The Action menu (⋮) will also available in the top-right corner and allows you to:
- Edit – Update training details such as title, description, or settings.
- Remove – Delete the training topic if it is no longer needed.
At the bottom of the page, you can manage training sessions under the Session section using the Add New + button.
Adding a Training Session
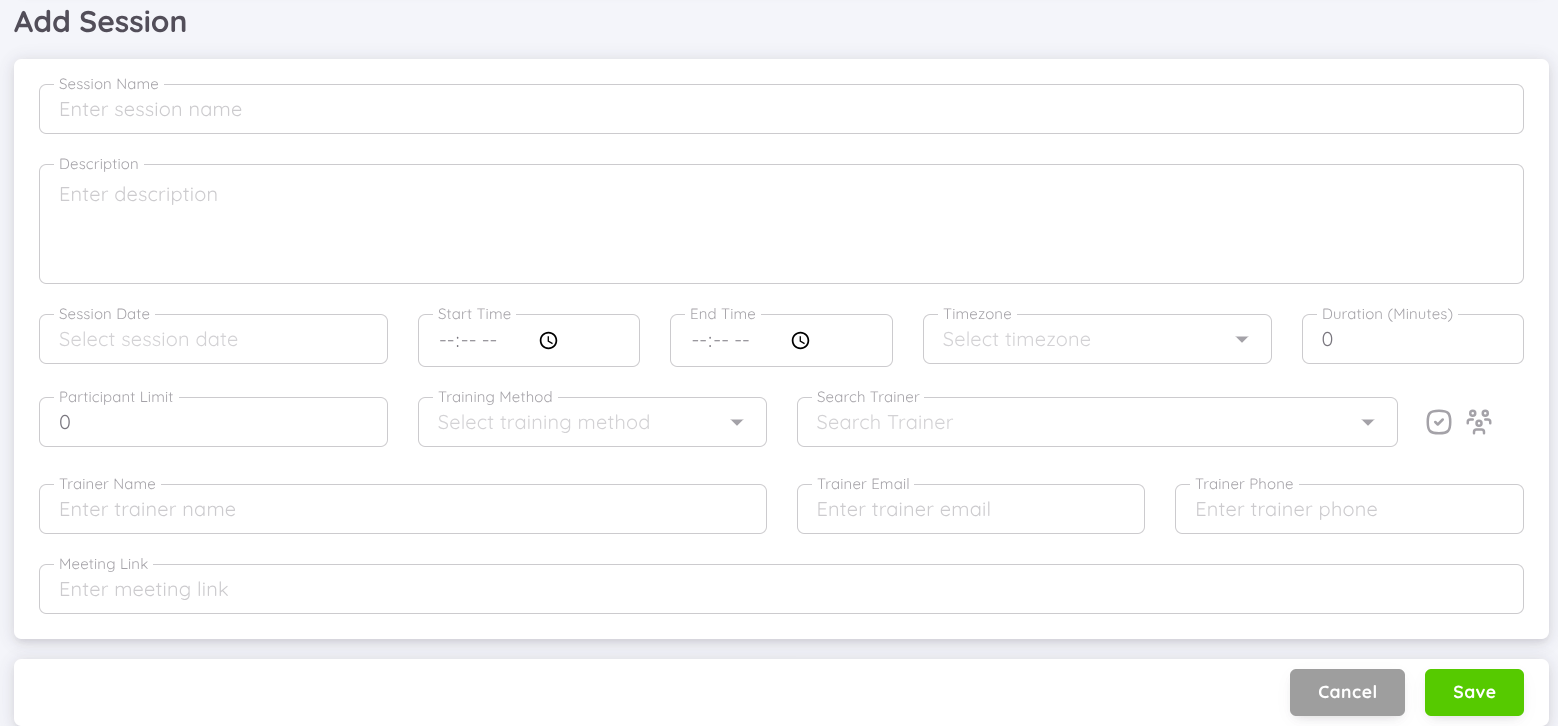
The Add Session menu allows you to create and schedule a new session for a selected training topic. Each session represents a specific occurrence of the training that employees can register for and attend.
In this menu, you can fill in the following details:
- Session Name – Enter the session title or identifier.
- Description – Provide a short overview of the session content or objectives.
- Session Date – Select the date on which the training session will take place.
- Start Time & End Time – Define the session’s duration by specifying start and end times.
- Timezone – Choose the relevant timezone for the session.
- Duration (Minutes) – You can input the duration of the session.
- Participant Limit – Set the maximum number of participants allowed to register.
- Training Method – Choose whether the session will be conducted online, offline, or hybrid.
- Trainer Information – You can search for and assign a trainer within your property or check the organization option to find a trainer within your organization. After selecting the trainer, their name, email, and phone number will be automatically filled.
- Meeting Link – If the session is online, include the virtual meeting link here.

All the sessions you have created will be available on the Training Details page. You can add as many sessions as needed according to your training requirements.
NOTE
The session you have created will not be automatically active. On the scheduled date, you can activate the session to allow participants to click Join on their training page. Once employees register for the training, it will be automatically added to their calendar.
Session Activation
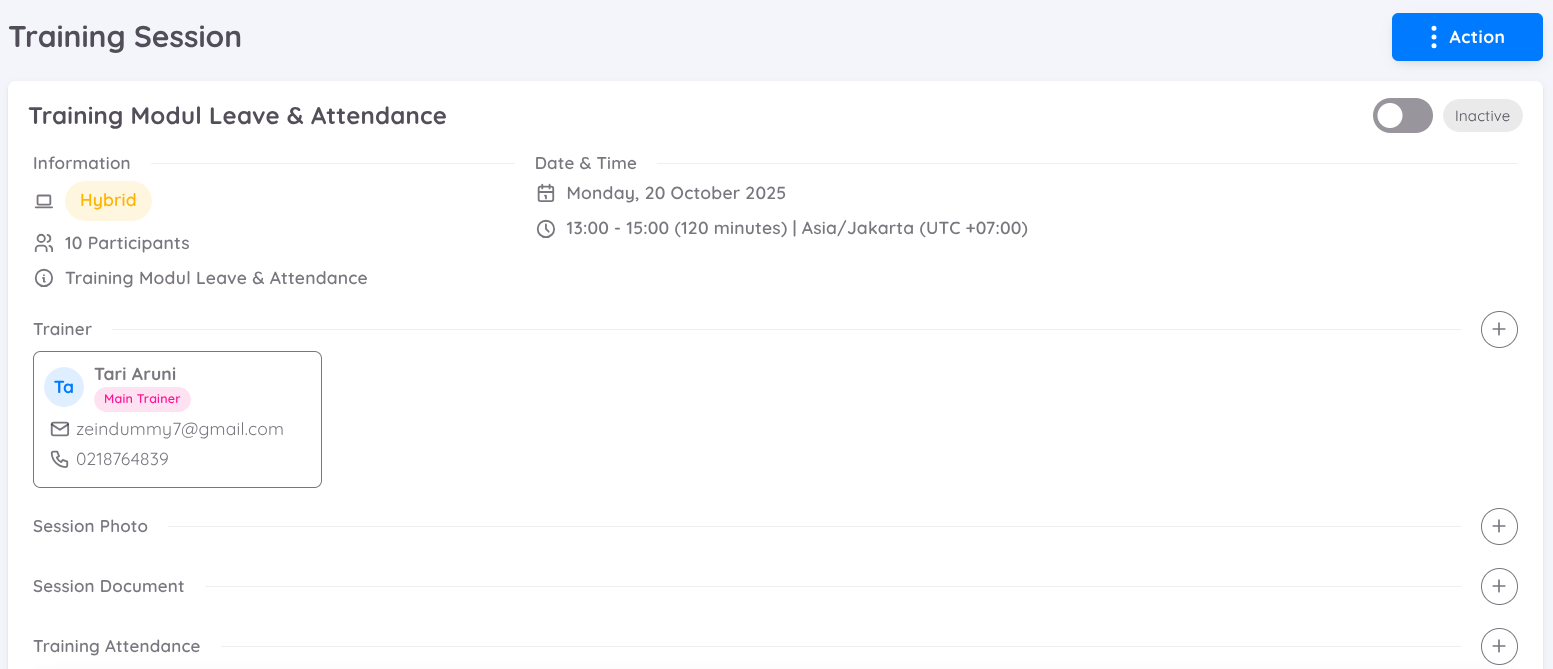
In the Session Details view, you can activate the session by toggling the Active switch on the scheduled date. Once activated, participants will be able to click Join on their training page.
Within each session, you can also add additional information such as:
- Co-Trainer – Add supporting trainers who assist the main trainer.
- Session Photo – Upload a relevant image or documentation of the session.
- Session Documents – Attach files such as training materials or attendance records.
- Manual Attendance – Add participant attendance manually if needed.
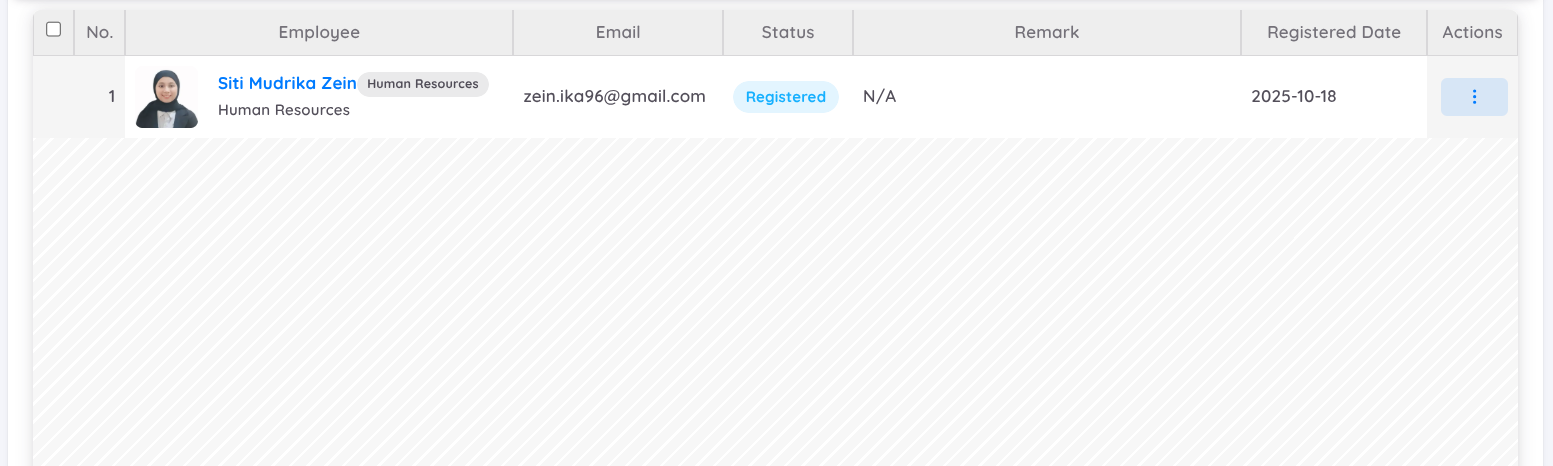
When participants register for a session from their Employee Page, their names will automatically appear in the Attendance List for that session.
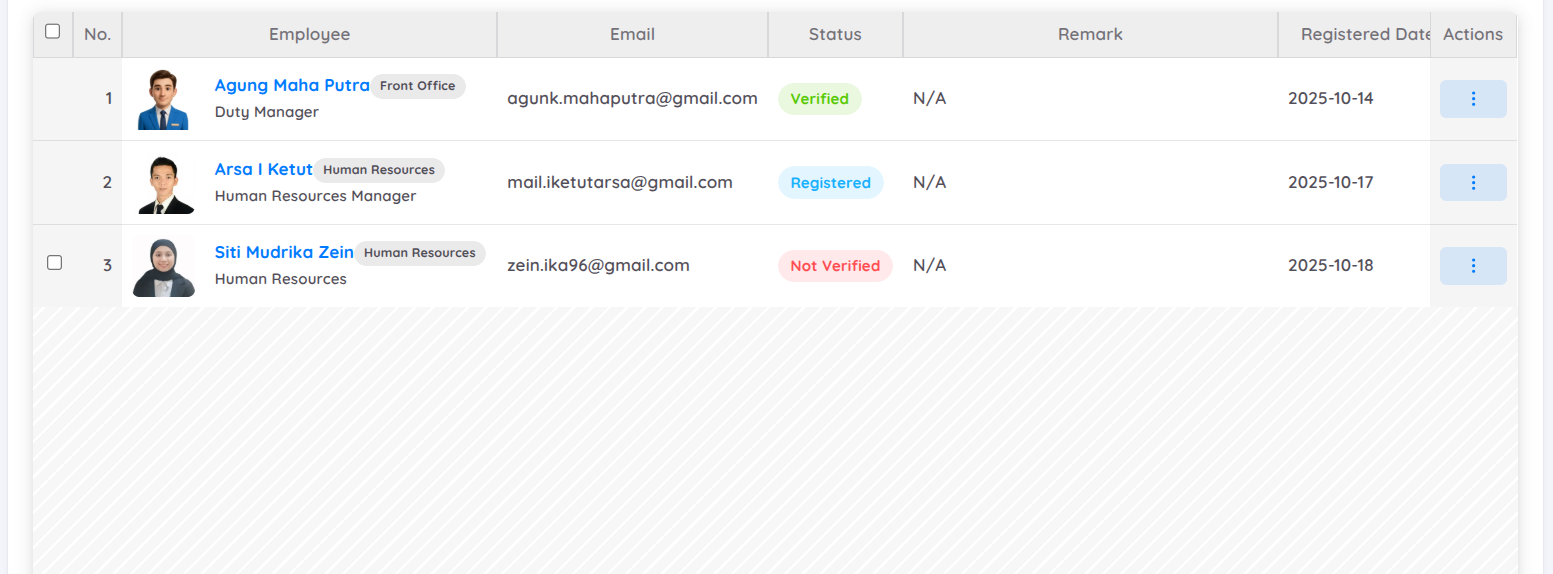
The Status field in the attendance list indicates the employee’s participation progress:
- Registered → The employee has registered for the training session through their own employee page.
- Not Verified → Once the session is activated, employees can click Join on their training page. Their attendance will then be recorded with a Not Verified status.
- Verified → You can confirm attendance by selecting the Verify option from the Action button. Once verified, their status will automatically update to Verified.
- Remove → If necessary, you can select Remove from the Action button to delete a participant’s attendance record from the list.
Add Participant
For each training session, you can also manually add participants. This feature is useful when participants are not registered through their employee page.
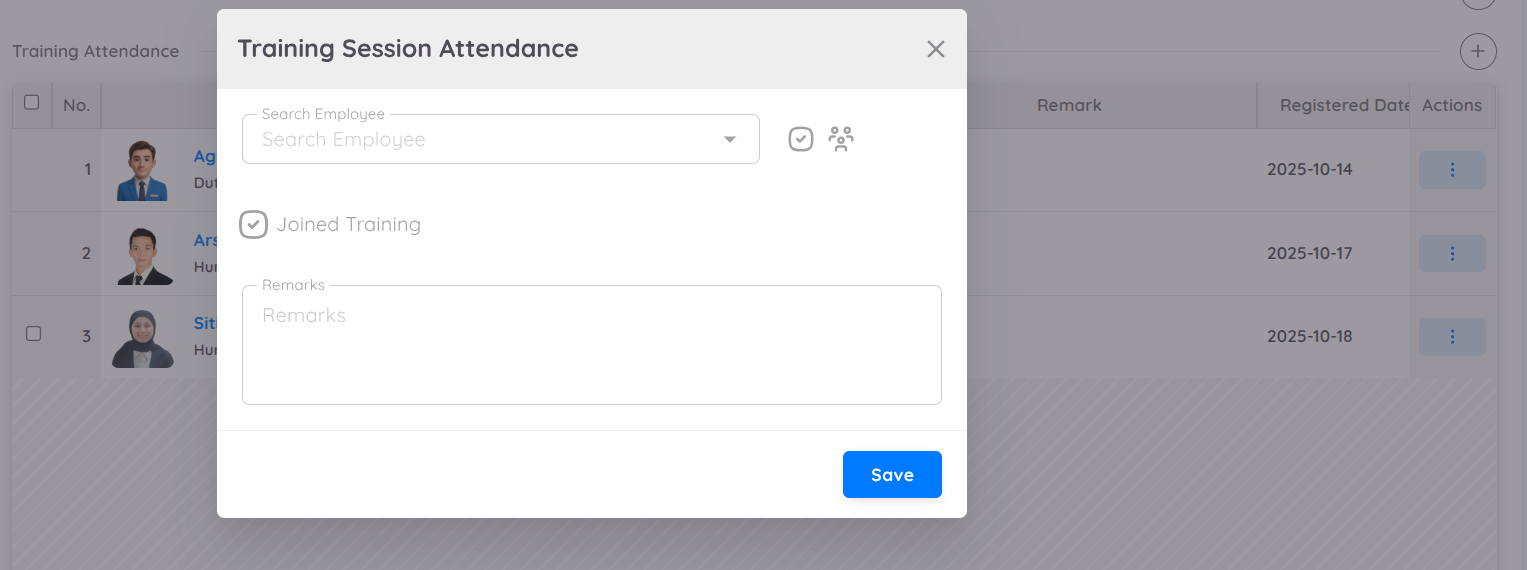
You can search for employees who are already active within your property, or locate participants from the Archipelago Organization by checking the Organization tab.
When adding a participant, you can:
- Type and select the employee’s name to include them in the session.
- Choose the Joined Training option to mark that they have attended the session.
- Provide Remarks if needed (e.g., special notes or justifications related to the participant’s attendance).
All manually added participants will appear in the Attendance List, where their attendance can later be verified or removed if required.