Form Submission
The Form Submission module allows HR and Management to monitor, review, and manage all employee-submitted forms in one centralized location. This feature ensures that submissions are properly tracked, reviewed, and processed in accordance with the company’s approval workflow.
Through this module, authorized users can preview submitted forms, manage approval statuses, and perform actions such as assigning, downloading, or deleting submissions. The availability of these actions depends on whether the form requires approval and its current approval status.
Before a form can be used, a form template must first be created in the Configuration menu.
List
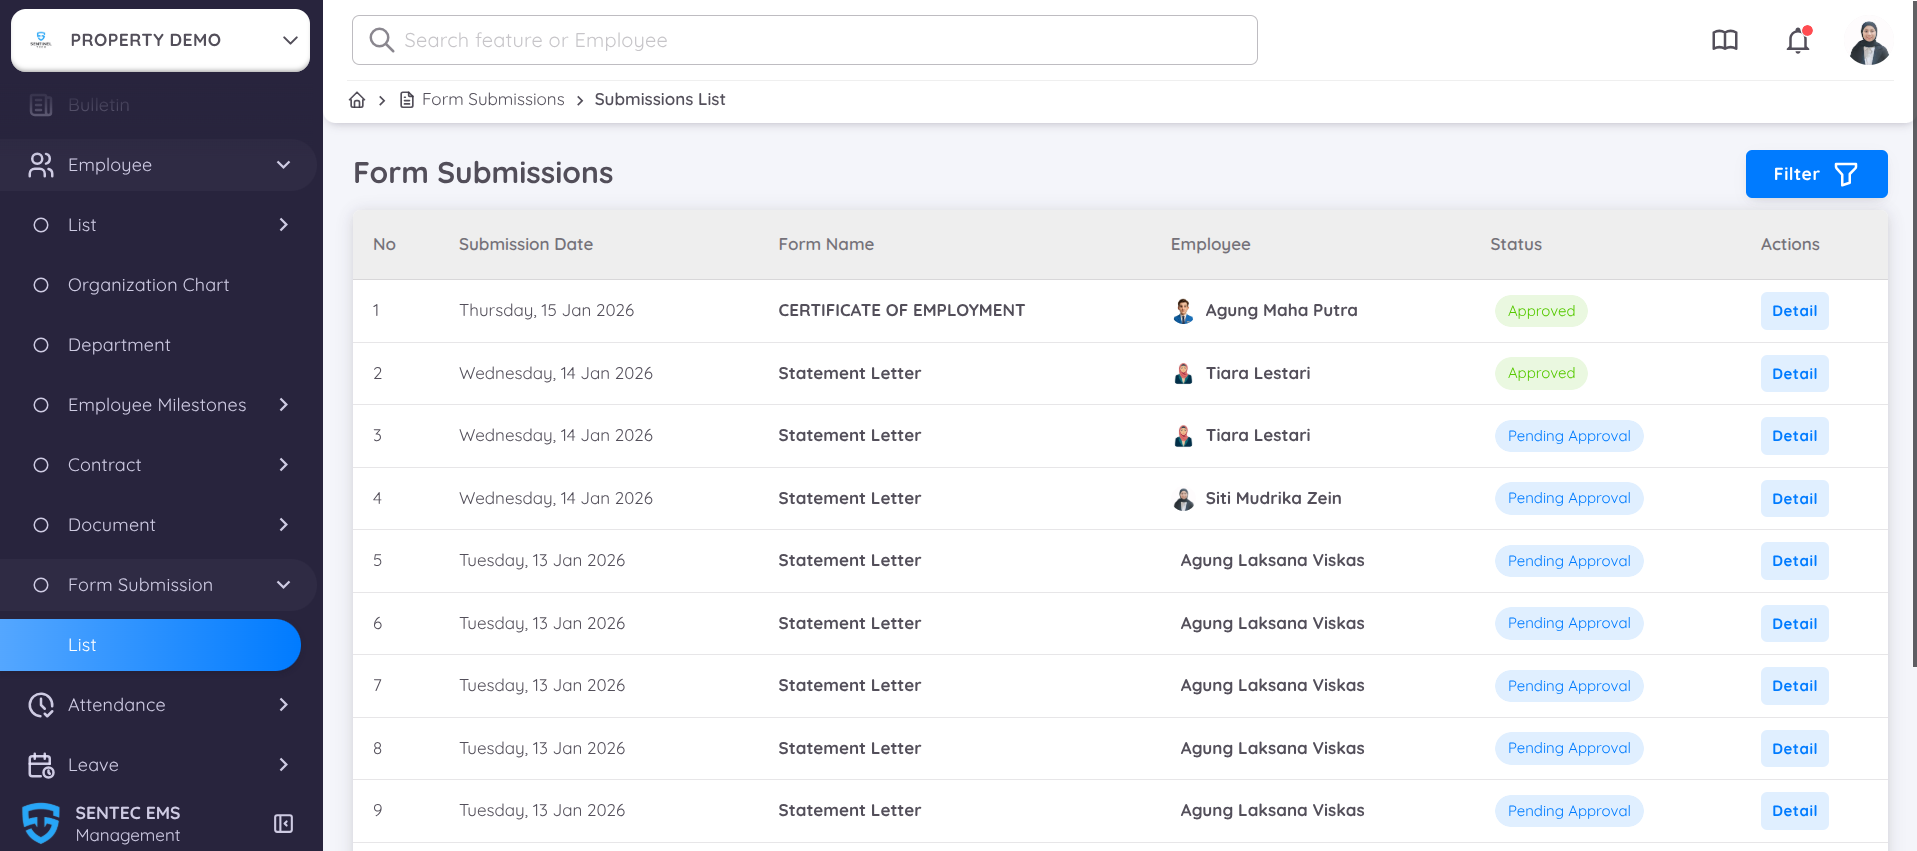
All employee form submissions are displayed in this menu. Users who has access to management page can preview and delete submissions, regardless of whether approval is required.
In this list, you can view which form has been submitted, the employee who submitted the request, and the current submission status. If the submitted form requires approval or a signature, the approval stage will be shown, indicating whether the form is Pending or Approved.
You can also filter submissions by Form Type and Submission Period and to view detailed information for a specific submission, click the Detail button in the Action column.
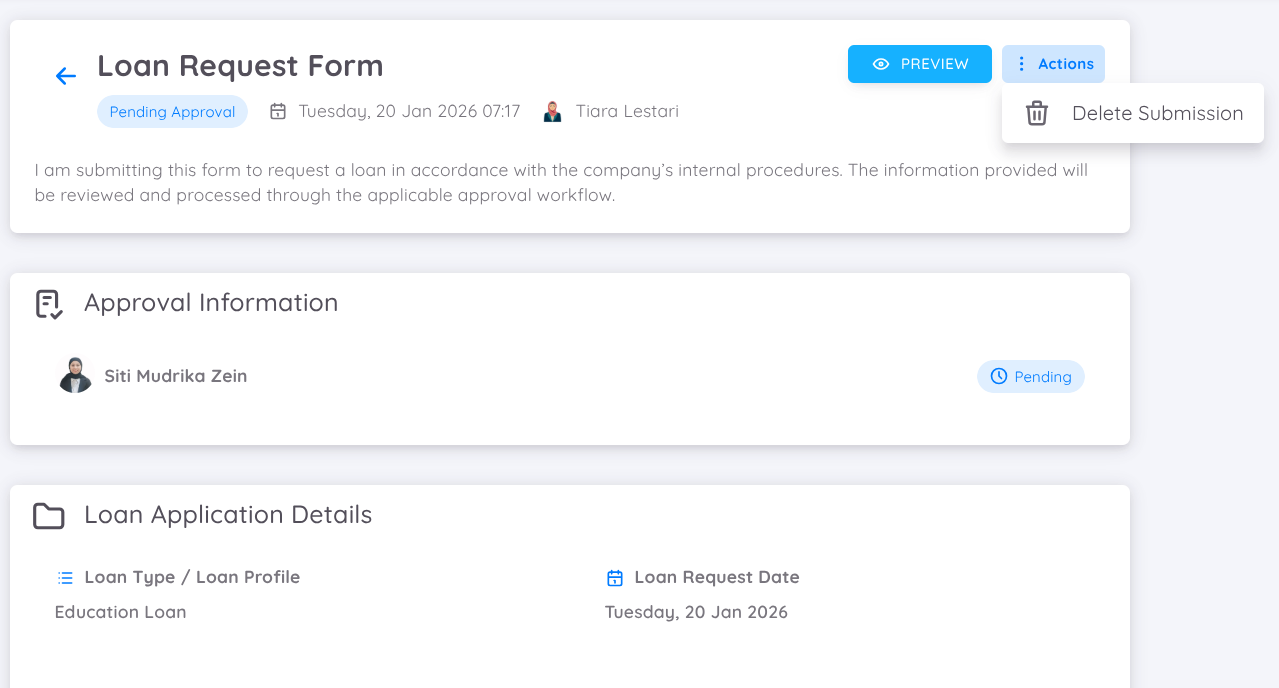


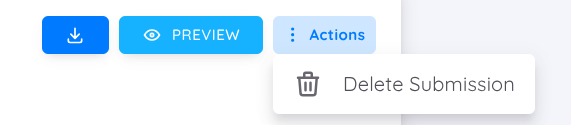
The Form Detail page displays information based on the submitted form. Several actions are available to users:
| Action | Description |
|---|---|
| Download | Available for forms that do not require approval, or after the form has been approved by the HOD or any additional approver, if applicable. |
| Preview | Allows you to preview the submitted form. |
| Action | Deletes the form submission. |
The form submission details are divided into several information cards:
First Card
Displays the form type, submission date, requester name, current status, and the opening text of the form.Second Card
If the form requires approval, this card displays the approver’s name and the current approval status.Third Card
Displays the grouped form items based on the employee’s input. These items appear between the opening and closing text.Fourth Card
If the form requires a signature, the employee’s signature is displayed in this section.Last Card
Displays the closing text of the form.
Form Preview
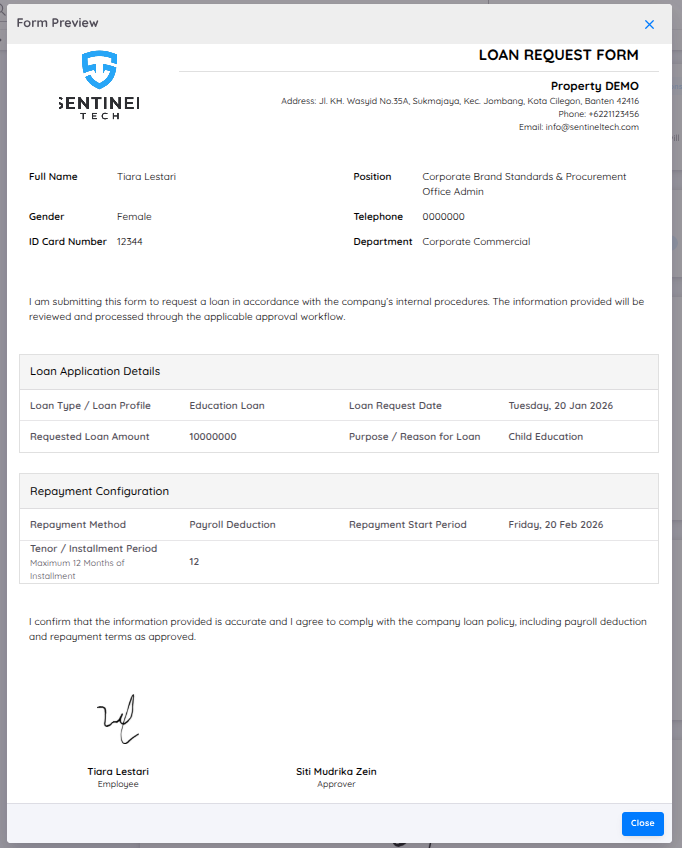
You can view the structure and content of the submitted form by clicking the Preview button.
| Section | Area Name | Description |
|---|---|---|
| Section One | Form Name | Displays the name of the form as defined in the form template, allowing users to easily identify the type of request being submitted. |
| Section Two | Logo and Property Details | Displays the company logo and property information configured in Property Configuration, such as company name, address, phone number, and email. |
| Section Three | Employee Data | Shows the employee’s personal and employment information, including full name, gender, ID card number, position, department, and contact details. |
| Section Four | Opening Text | Displays the opening statement of the form, providing context and explaining the purpose of the submission. |
| Section Five | Group Item 1 | Displays the first group of form items based on employee input, such as loan application details or other related information. |
| Section Six | Group Item 2 | Displays the second group of form items, such as repayment configuration or additional form-specific details, depending on the form setup. |
| Section Seven | Closing Text | Displays the closing statement of the form, usually containing confirmations or acknowledgements from the employee. |
| Section Eight | Requester and Approver Name & Signature | Displays the requester’s and approver’s names along with their signatures, if required by the form approval and signature configuration. |
Assign Form
Forms can be assigned directly from the Management Page, allowing Custom Forms to be assigned to specific employees through the management interface. User can also view and track form submissions for each employee.
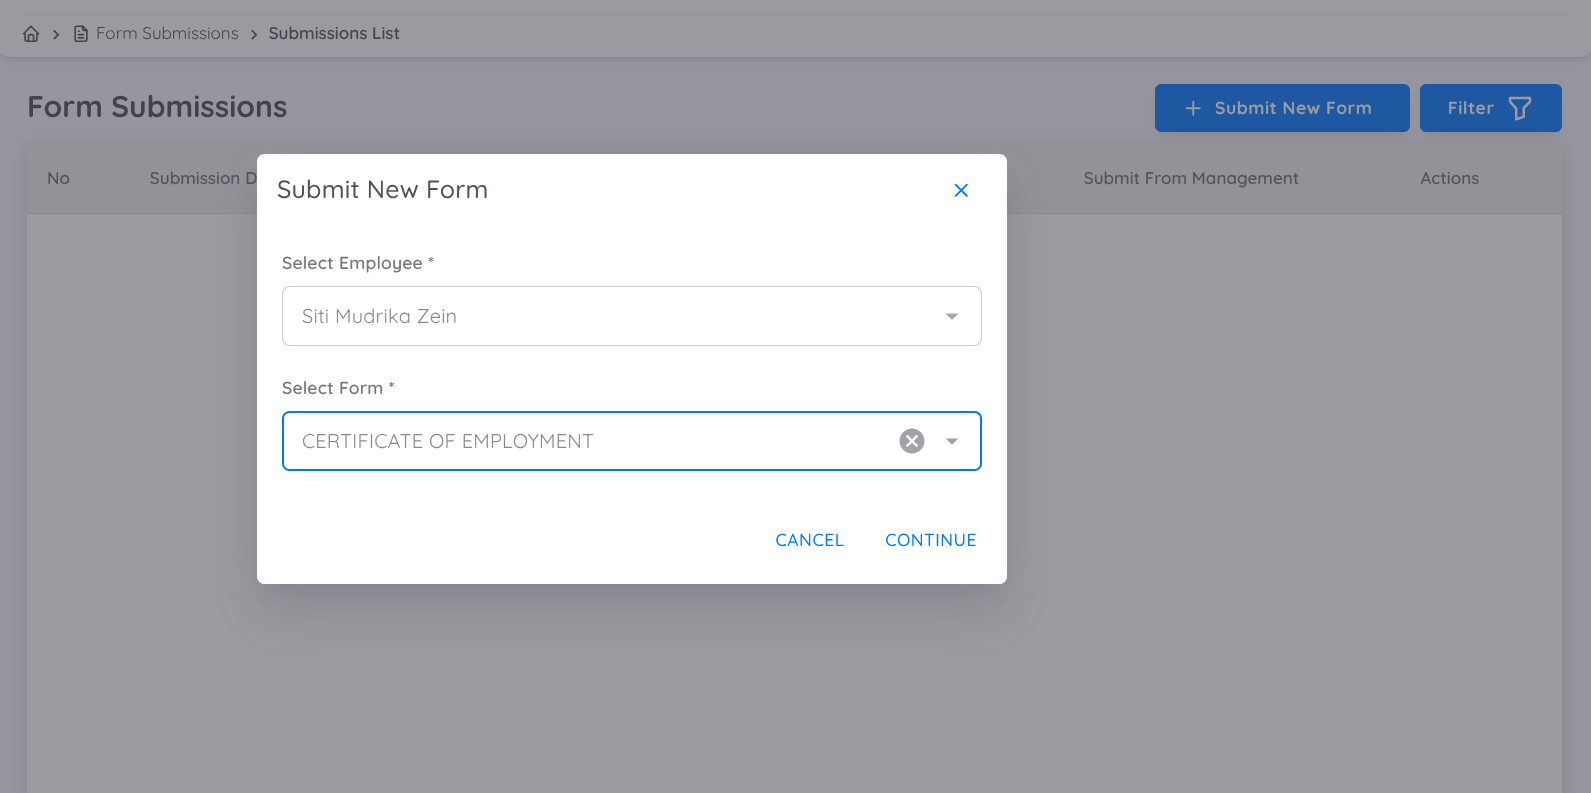
Navigate to Employee Menu → Form Submission → List → Submit New Form.
- Select the employee to whom the form will be assigned by typing and selecting the employee’s name.
- Select a form template.
Based on the selected form template, Management or HR can fill in the required information and add notes or instructions for the assigned employee.
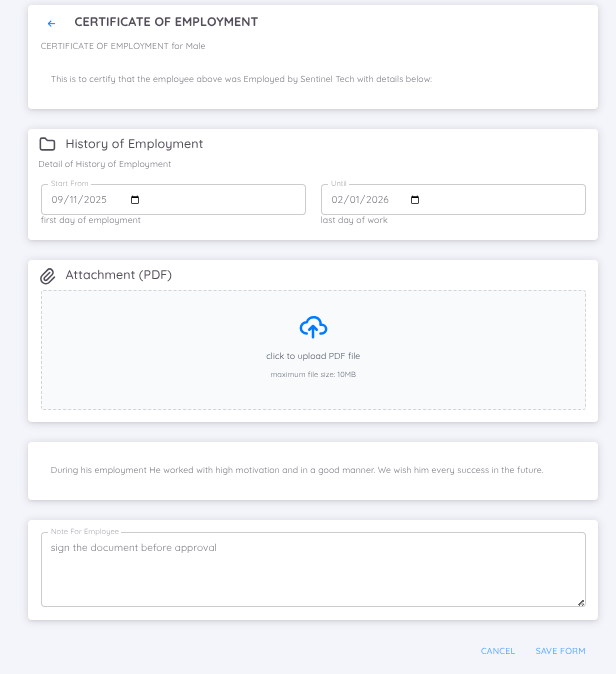
Once the form is assigned:
- The employee will receive a notification informing them of the assigned form.
- The employee can access and complete the form through the Form Submission menu.
- Any notes or instructions provided by Management or HR will be visible to the employee and can be used as guidance when completing the form.